Home – memorykeepingideas.com

Recent Posts

Thanksgiving Scrapbook Layout Ideas & Inspiration – Part 2


thanksgiving scrapbook layout ideas

Another blogpost filled to the brim with awesome Thanksgiving Scrapbook Layout Ideas & Inspiration! So, if you’re looking for some scrapbook inspiration to document your family’s Thanksgiving, you’ve come to the right place! This is part 2 in a series of blog posts featuring awesome Thanksgiving themed layouts! (Click HERE to see all the wonderful Thanksgiving scrapbook layouts gathered in Part 1!). 

But enough chit-chat! Let’s take a look at some gorgeous and unique layouts!

Big Stylized Page Filling Embellishment

When making themed pages, it is a great idea to use a big element to support the theme, in this case: Thanksgiving! Here are some examples of page filling stylized elements!

Big stylized embellishment thanksgiving Layout Ideas Scrapbooking
Layout by Allie Stewart

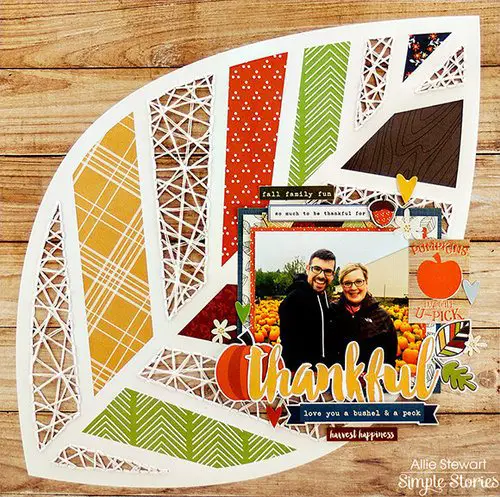
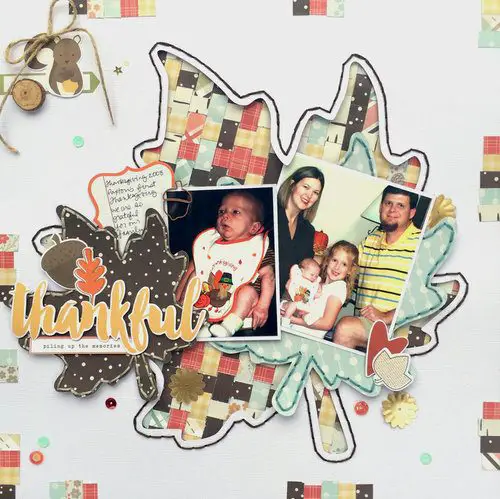
This beautiful layout features a large colorful leaf. The cutout spaces are filled with lovely color-coordinating pages and delicate needlework. It could be a great way to use up your paper scraps! The photo is put on top of a stack of pattern paper pieces, creating a solid base for the cluster. And, of course, cute little embellishments are added! But the undisputed star of the show is the big stylized leaf! 

Design elements: Use a big cut-out stylize leaf as the base of your layout.
Finishing touches: The cluster is the perfect way of displaying your photo.
Cute details: The delicate embroidery added to some parts of the leaf are truly exquisite!

Big stylized embellishment thanksgiving Layout Ideas Scrapbooking
Layout by Majkenmarie (Scrapbook.com)

Another big stylized leaf! This time the leaf cutout exposes little multicolored pattern page rectangles, giving a lovely quilted effect. Two smaller leaves are used to cluster the two featured photos. Small pieces of pattern paper rectangles are added to the border of the page, nicely tying the page together. In my personal opinion, a more minimalistic look, with lots of white space around the large leave element and cluster would have looked very nice as well.

Design elements: Cut out the whole leaf, exposing pattern paper underneath.
Finishing touch: Two more of the same type leaf are used in the photo cluster, continuing the theme of the page.
Cute details: The cutout leaf as well as the smaller leaves have an embroidered border. What a lovely effect!

Big stylized embellishment thanksgiving Layout Ideas Scrapbooking
Source: Pinterest

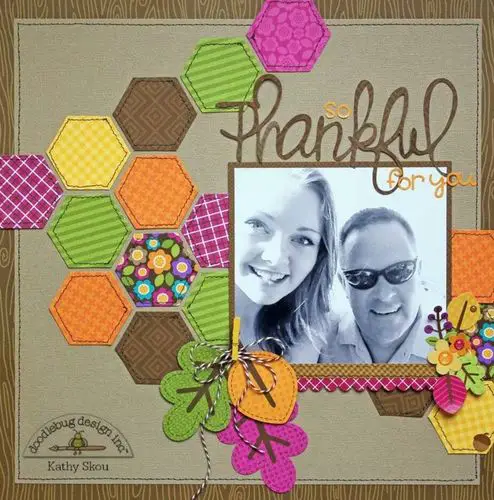
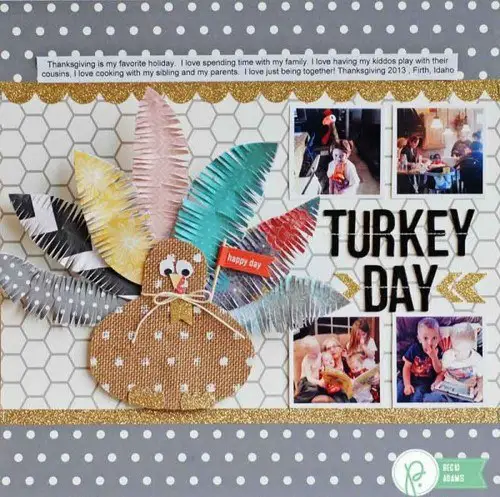
On this page, the big element is build up out of lots of hexagons. Their colors coordinate beautifully with the flowered pattern paper used in one of the hexagons. The photo is in black and white, which heigthens the contrast between the colorful background design and the feature photo. I love the simplicity of this look. The little leaves and flower clusters form the base of the design triangle!

Design elements: Build up your big stylized background out of repeating shapes, for instance: hexagons!
Finishing touches: The cluster of leaves and the cluster of flowers form a design triangle with the title.
Cute details: Stitching around the individual hexagons and larger leaves. 

Big stylized embellishment thanksgiving Layout Ideas Scrapbooking
Source: Pinterest

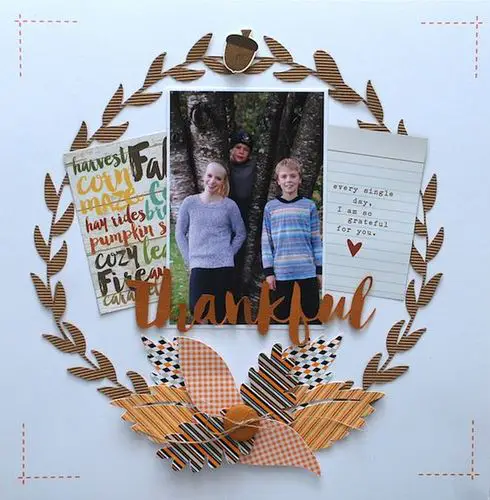
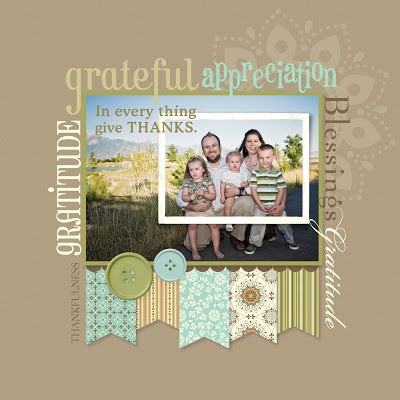
This layout oozes simplicity and style. Cute leaf shapes are cut out from pattern paper and clustered with a button and string. And the whole page is pulled together with a stylized laurel wreath. The finishing touches are the striped lines in all the corners. Such a lovely page!

Design elements: Pull the different page elements together by surrounding them with a large element, for instance: a stylized laurel wreath.
Finishing touches: The photo is flanked by a card on both sides. This makes the layout more playful and creates an internal design triangle.
Cute details: The stitched or striped corners!

Big stylized embellishment thanksgiving Layout Ideas Scrapbooking
Layout by Nathalie DeSousa

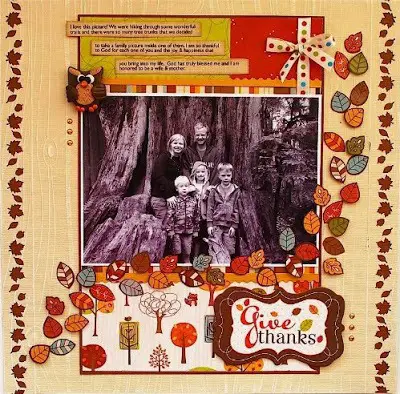
Another great idea for a big stylized page element: This cluster of cutout leaves makes a colorful, yet uniform, background to the photo with the beautiful fall colors. Some of the cutout leaves have a backing of pattern paper, some have a simple light gray backing. The effect is quite awesome! Notice the use of white space: the multileaf background does not cover the entire page, but is spread like a banner, leaving a top and a bottom area of white space. 

Design elements: Create a background using similar cut-out shapes, in this case: little leaves.
Finishing touches: Filling some the cut-out leaves with different pattern paper is pure genius.
Cute details: The paint splatters lift up the grey background paper with a little pop of color, coordinating nicely with the rest of the color scheme.

Big stylized embellishment thanksgiving Layout Ideas Scrapbooking
Layout by Mendi Yoshikawa

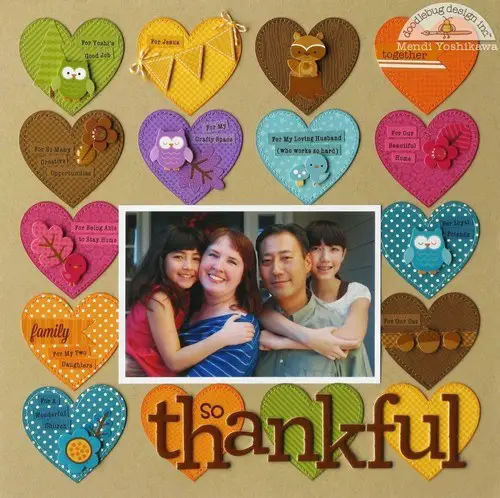
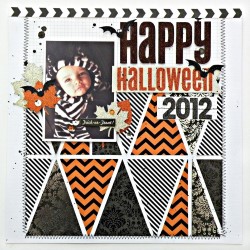
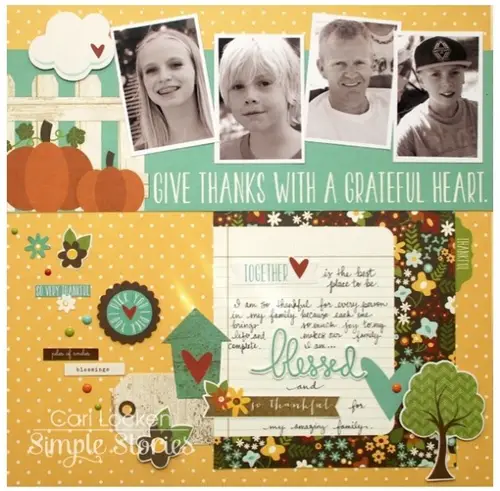
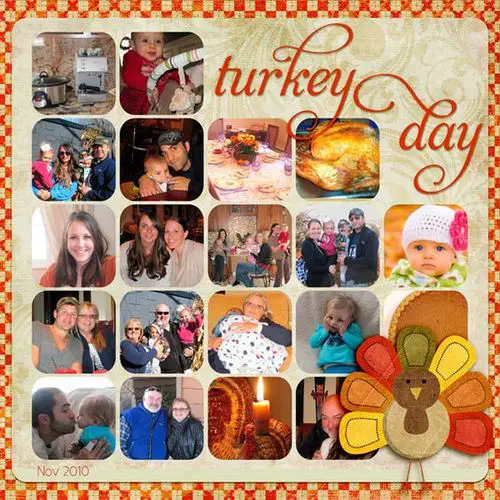
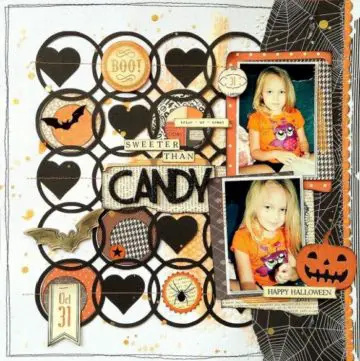
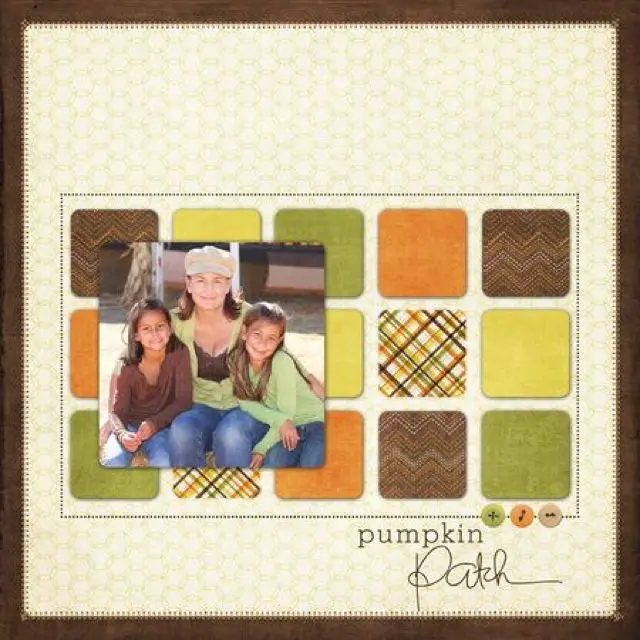
Another page with a repeating background pattern: this time the background is filled with colorful hearts and matching cute embellishments. The hearts are arranged in a grid, which helps to keep the page neat, organized and not too overwhelming. The photo fits perfectly in a 4×4 piece of the larger grid. And the large title is the perfect finishing touch. 

Design elements: Use a grid of big colorful hearts as your background.
Finishing touches: Same colored embellishments in the different hearts liven up the page, whilst still keeping it neat. 
Cute details: Did you spot the raccoon? And the little blue toadstool? So cute!

Big stylized embellishment thanksgiving Layout Ideas Scrapbooking
Layout by Fancy Pants Designs

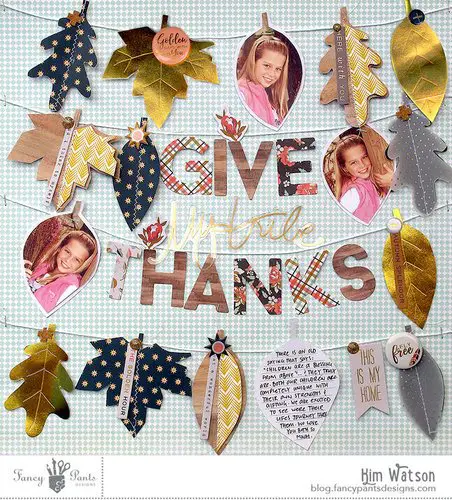
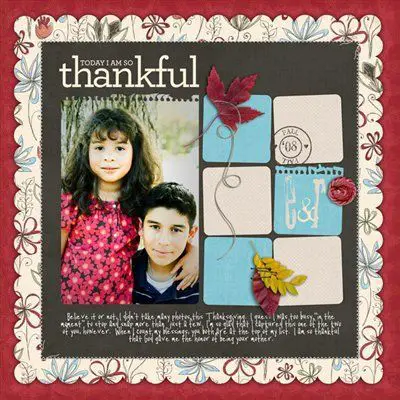
The large stylized element on this page is built up from different kinds of leaves hanging from washing lines. Some of the leaves are filled with photos, and one is filled with journaling: what a cute and original idea! The way the leaves are hanging creates a grid, forming a nice repeating pattern that frames the large and prominent title. Little embellishments are added to the hanging leaves as finishing touches. 

Design elements: Build up your page using different shapes of fall leaves.
Finishing touches: Adding photos to some of the leaves.
Cute details: The itty bitty staples used to hang the washing lines!

Big stylized embellishment thanksgiving Layout Ideas Scrapbooking
Layout by jlhufford (Scrapbook.com)

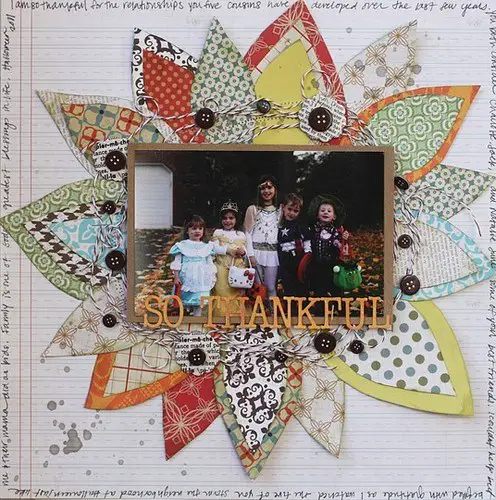
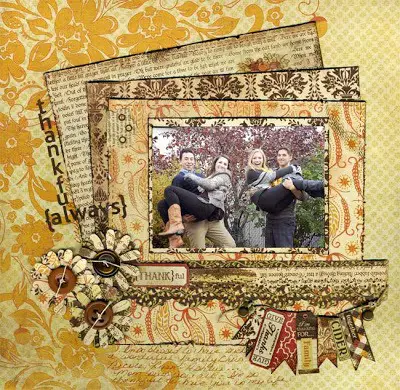
Another great stash busting layout! The featured photo forms the center of a large paper flower that is built up from pattern paper leaves. The photo itself is pretty dark. This makes it possible to use all kinds of colors and patterns for the petals. I love how some of the leaves are double layered and some single. And notice how the journaling is added all around the edge of the layout!

Design element: Make your photo the center of a beautiful stylized flower.
Finishing touch: Double up with your pattern paper on some of the flower petals.
Cute detail: Write your journaling all around the edges of your page!

Big stylized embellishment thanksgiving Layout Ideas Scrapbooking
Layout by Anita Bownds

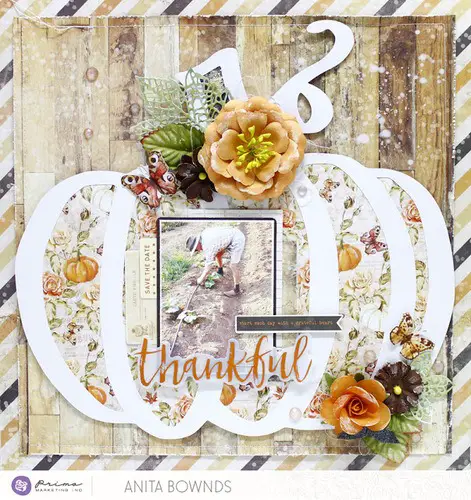
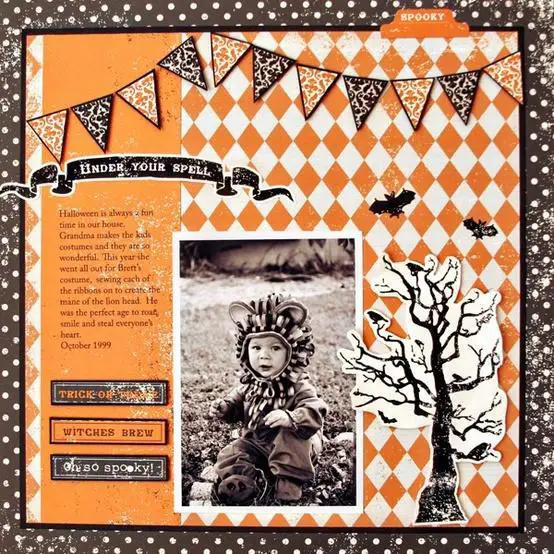
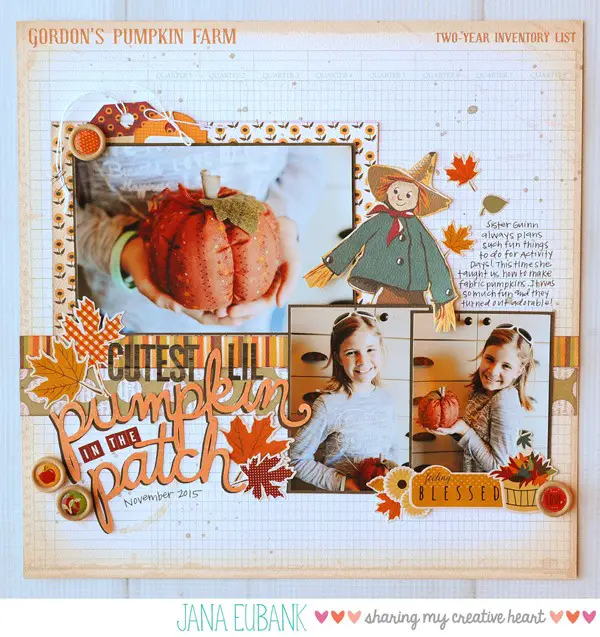
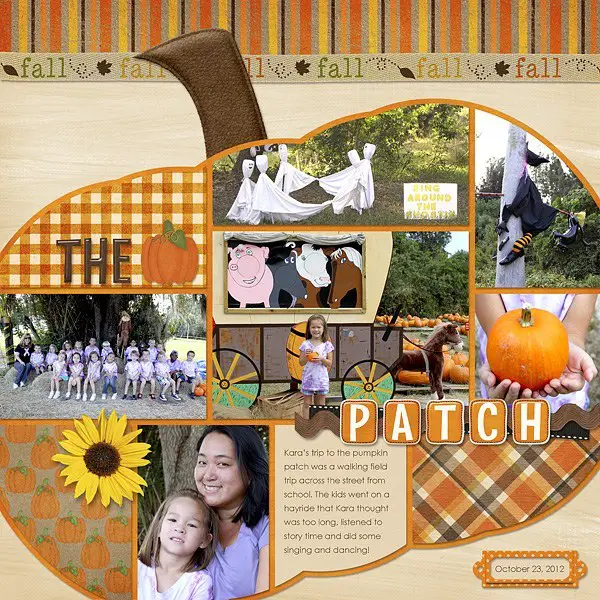
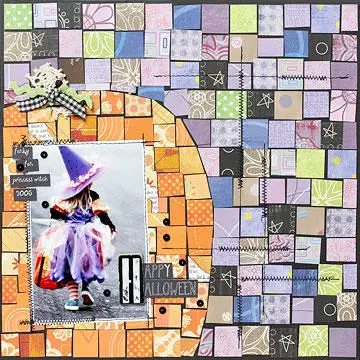
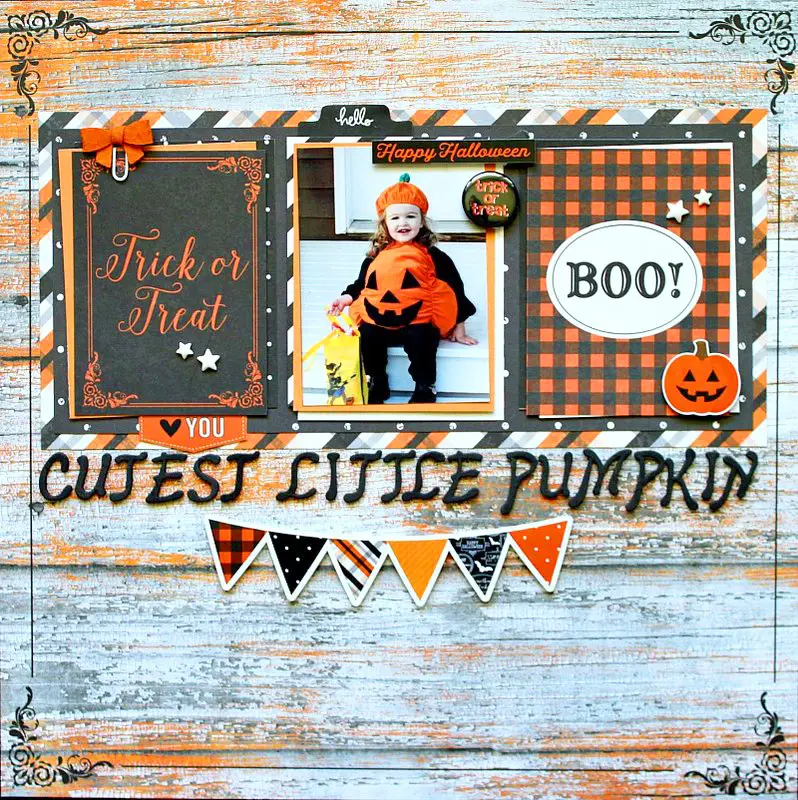
Of course, there was bound to be a big pumpkin on one of these layouts! This lovely white cutout is filled with a very sweet pumpkin pattern paper. The colors of this cute paper fit perfectly with the central photo. The whole pumpkin, complete with orange flower clusters, is on top of a distressed wood pattern paper and the whole layout is matted by a distressed stripe pattern paper. Had the pumpkin cutout itself not been neutral and white, the whole layout would have been a bit too much of a good thing. The choice for a white pumpkin, however, combined with the choice to fill it with the same pattern paper in every open cutout space is spot on and really pulls this layout together.

Design elements: Use a page filling cut out pumpkin as the base of your layout.
Finishing touches: The gorgeous flower clusters on the top and bottom of the pumpkin.
Cute details: Notice the cute little butterflies near the flower clusters!

Big stylized embellishment thanksgiving Layout Ideas Scrapbooking
Layout by Lisa Dickinson

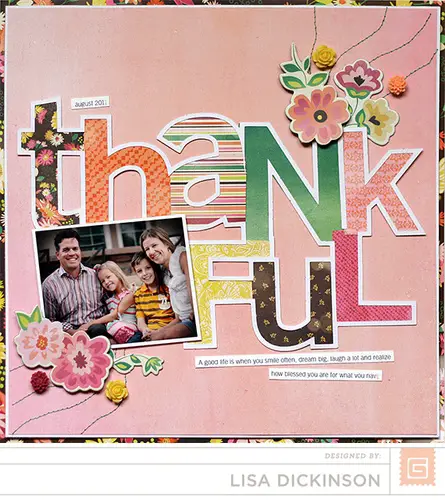
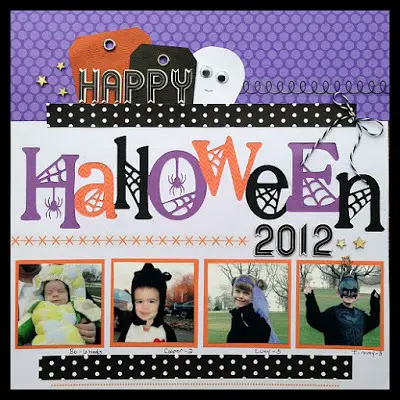
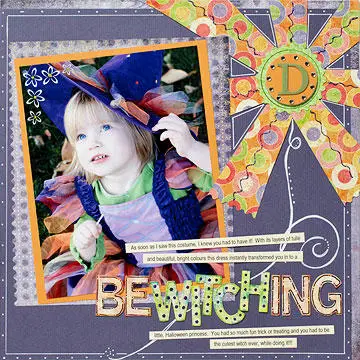
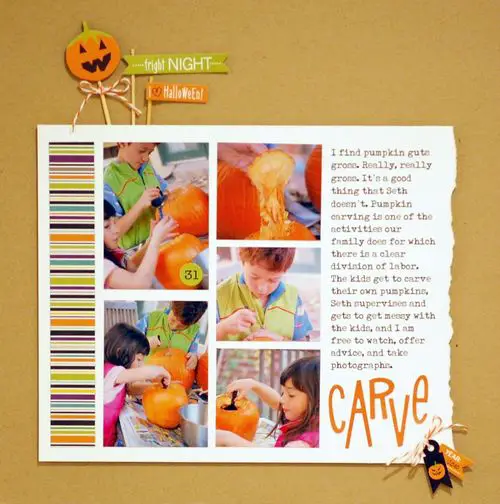
In this layout, the title itself is the big stylized page element. The font is playful, combining capital and low-case letters and the pattern papers that fill them are funky and colorful. The tile, photo, and flowered clusters are all grouped together in the middle of the page, leaving enough white space to ensure this layout in total doesn’t become too busy.

Design elements: Design your page around a big colorful title.
Finishing touches: Color coordinate the pattern paper used in the title with the colors of the other embellishments on the page.
Cute details: The stitching in two corners almost resemble little flower stems.

Document The Silly Moments

Of course! You want your layouts to be beautiful and classy and Pinterest-worthy. I mean, don’t we all? But please, don’t forget about documenting some of the silliness of your family members (or yourself)! Every family has its own silly moments or people and a holiday like Thanksgiving is the perfect opportunity to capture that goofy side and to create a funny and unique scrapbook page. Let’s get inspired by some of the documented silliness of other scrapbooker’s family members and get ready to get your silly on this Thanksgiving!

document the silly moments thanksgiving Layout Ideas Scrapbooking
Layout by Patjohnson (Scrapbook.com)

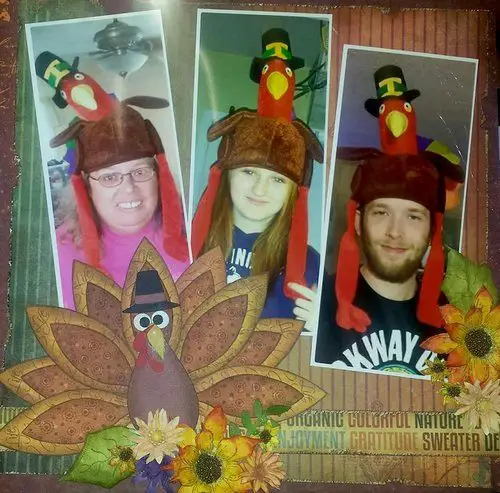
If you have a goofy pilgrim turkey hat like this glorious specimen, of course you need a picture of every family member wearing it! Crop those silly photos vertically and you can fit all of them in one layout. I particularly like the fact that the pilgrim-hatted turkey is not only on the people’s heads but also has a fitting place elsewhere on the page in the form of a very cute matching turkey embellishment!

Design element: Crop your goofy portraits vertically to fit them all on your silly layout!
Finishing Touch: The matching pilgrim-hatted turkey embellishment.is the perfect finishing touch.
Cute detail: I just love the pictures and the groovy smiles on the people’s faces.

document the silly moments thanksgiving Layout Ideas Scrapbooking
Source: myshinystudio.blogspot.com

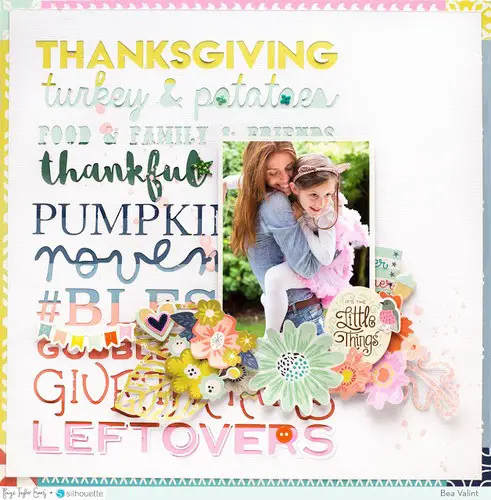
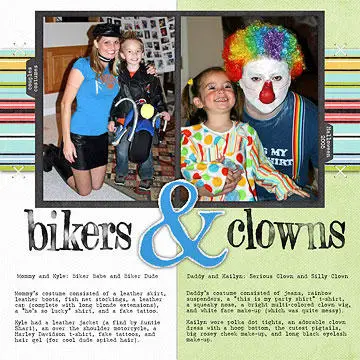
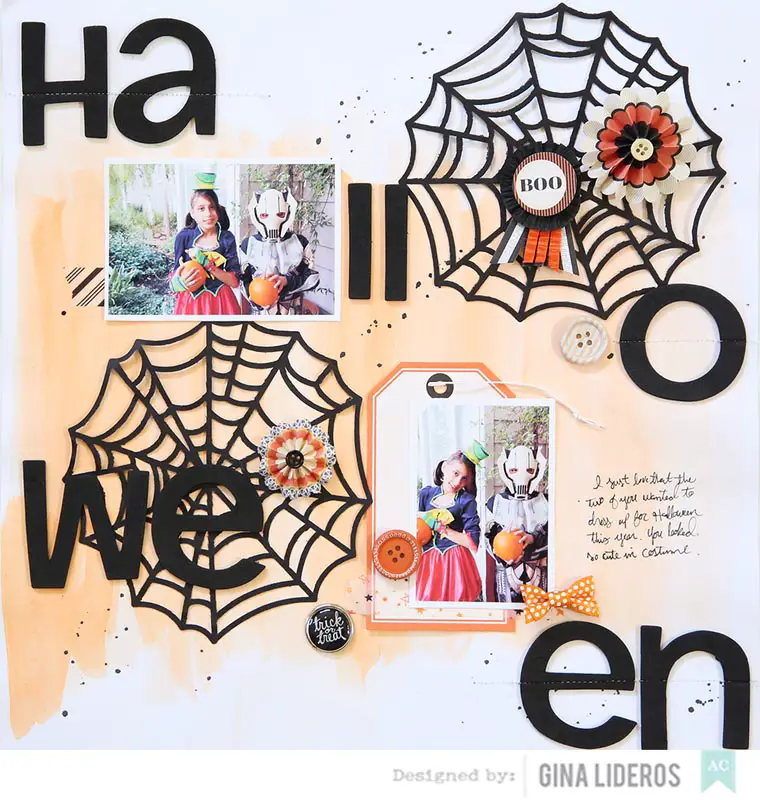
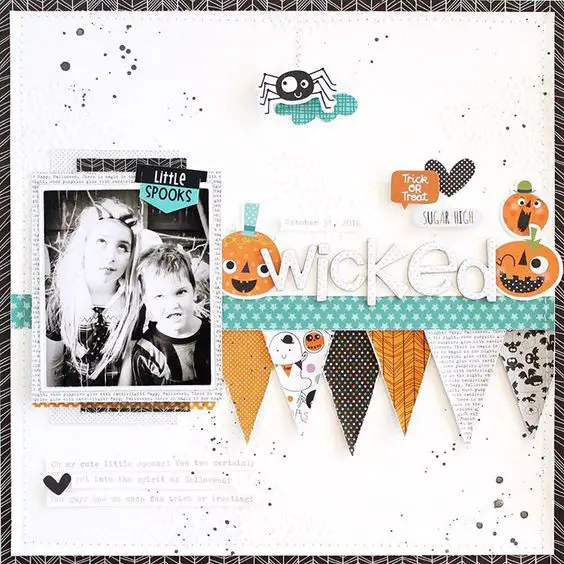
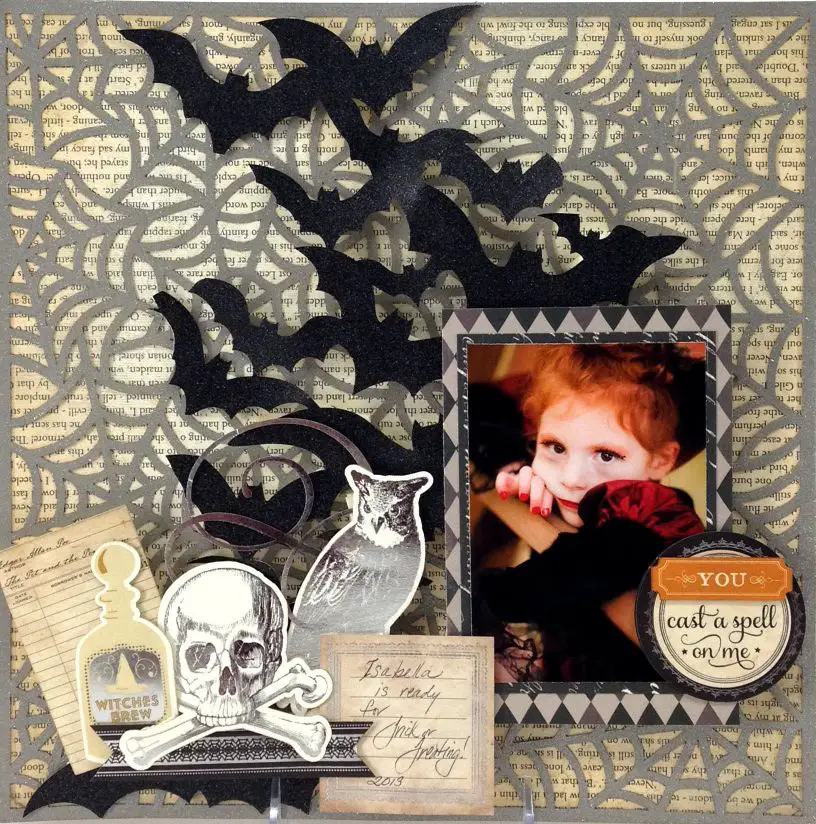
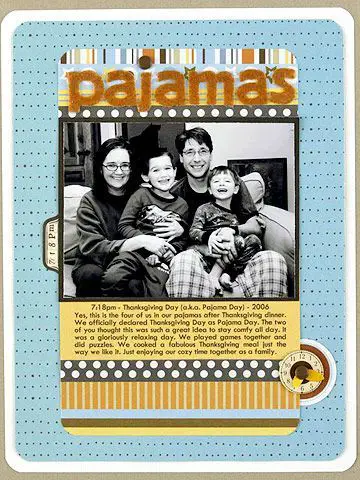
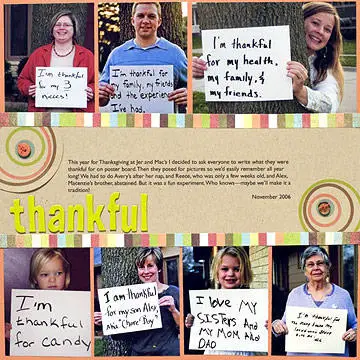
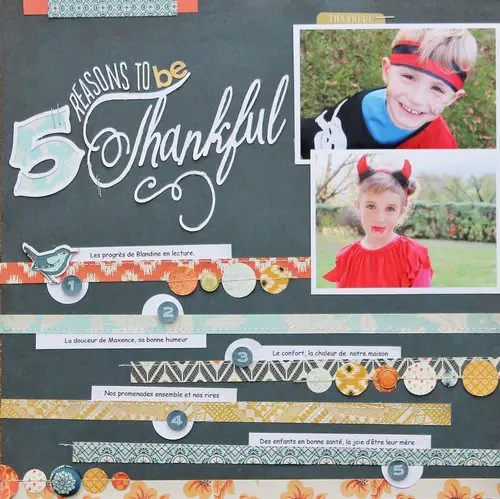
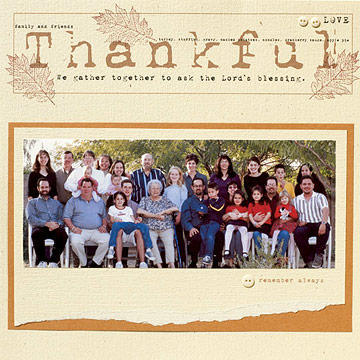
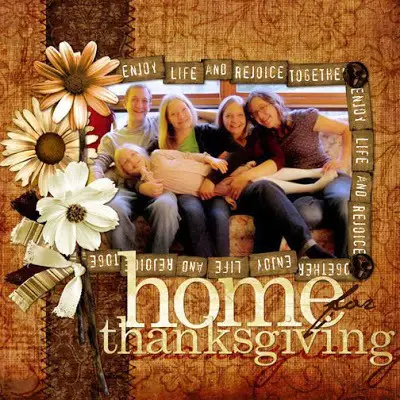
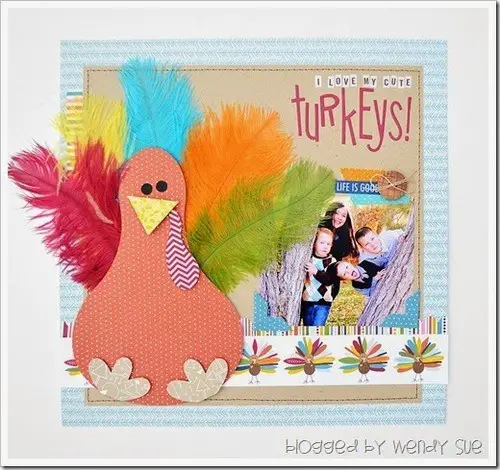
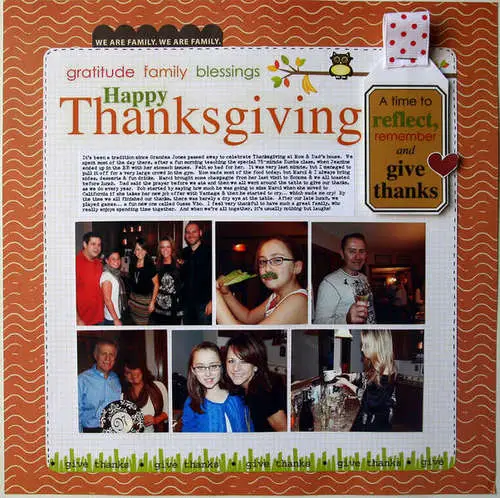
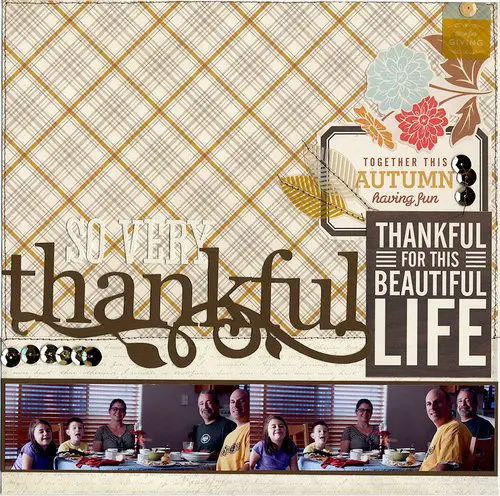
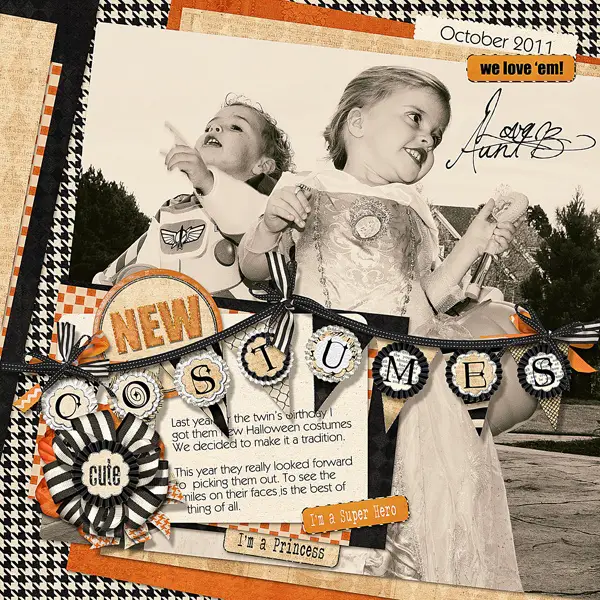
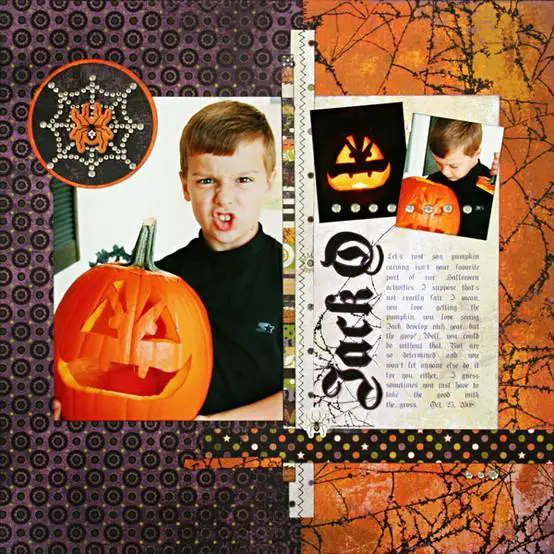
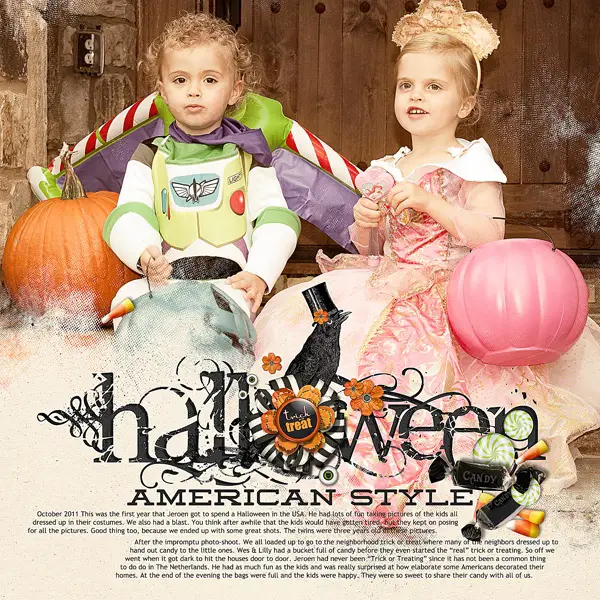
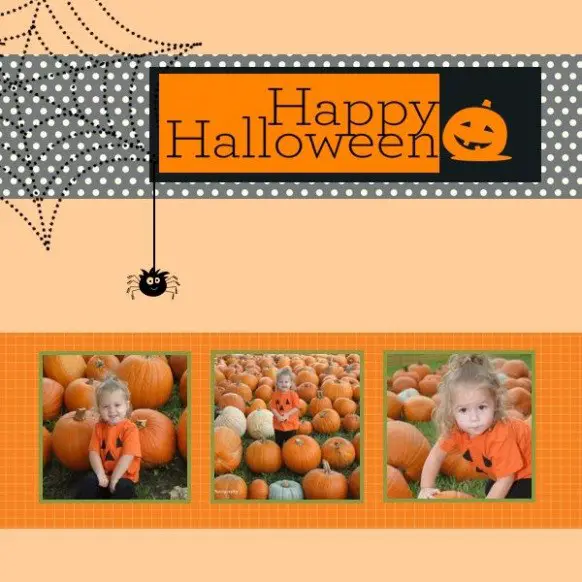
This is not so much a silly layout, but the featured photo does capture a spontaneous and funny moment, and those moments are worth documenting! The page doesn’t sport the traditional Thanksgiving color scheme, but is a brighter layout with all sorts of different colors. The large words on the left side of the page have been cut out of white cardstock, and a multi-colored pattern paper is put behind it to make those words color pop. This is such a cool idea!

Design element: Cut out big words (or just your title) and layer them on a multicolor background.
Finishing Touch: The floral arrangement around the photo is the perfect finishing fouch.
Cute detail: I love the little button in the R of the words “leftovers”.

document the silly moments thanksgiving Layout Ideas Scrapbooking
Source: Pinterest

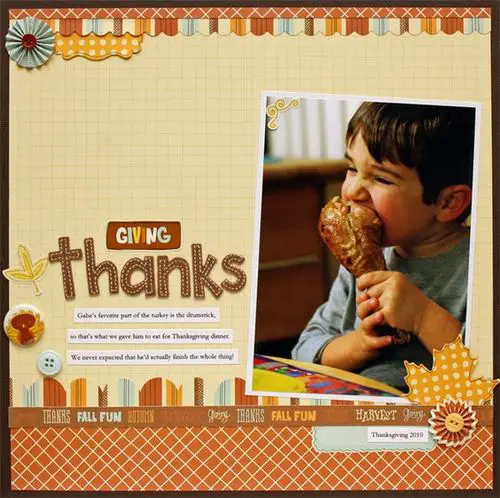
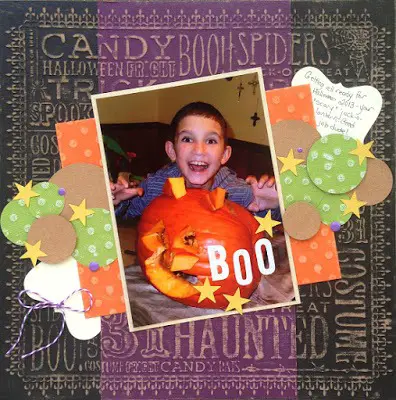
Now this is my kind of picture! I mean, what’s the point of cooking up an entire turkey meal, not to have someone devour one of its legs! What a wonderful moment to capture on camera and what a great idea to feature this photo prominently on this page! The turkey leg is almost as big as his head! This photo just tells the entire story and therefore the rest of the layout is kept pretty minimal. Overall, the page looks very cute!

Design element: If your photo is goofy and silly enough give it pride of place and keep the rest of the layout pretty minimal.
Finishing Touch: I love the scalloped edges of the pattern paper.
Cute detail: The little turkey button on the left side of the page! So cute!

document the silly moments thanksgiving Layout Ideas Scrapbooking
Layout by Heather Leopard

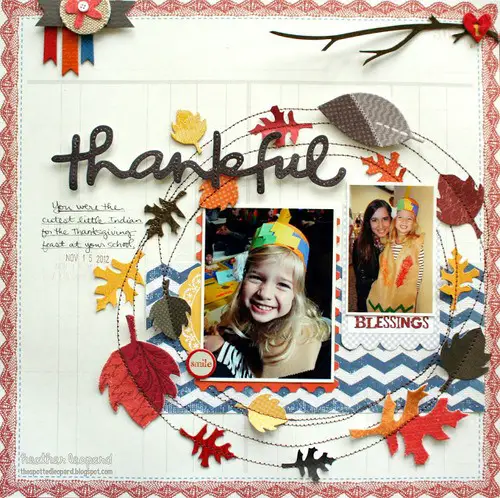
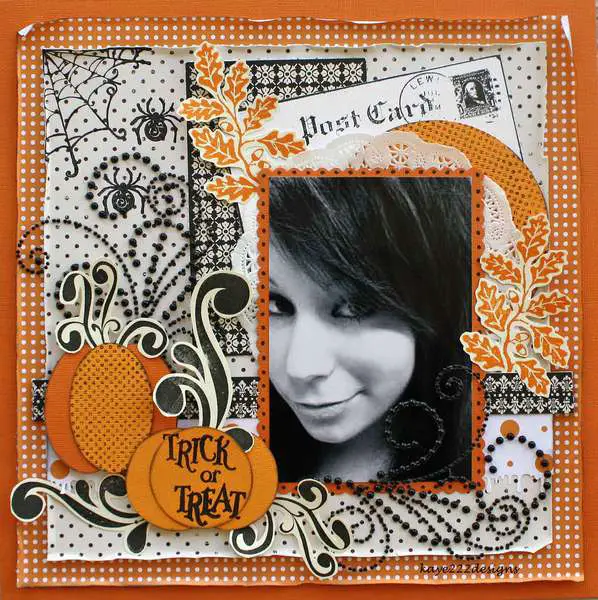
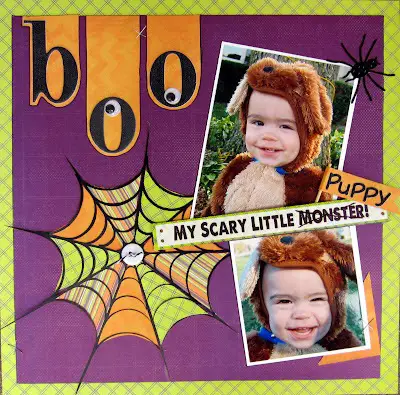
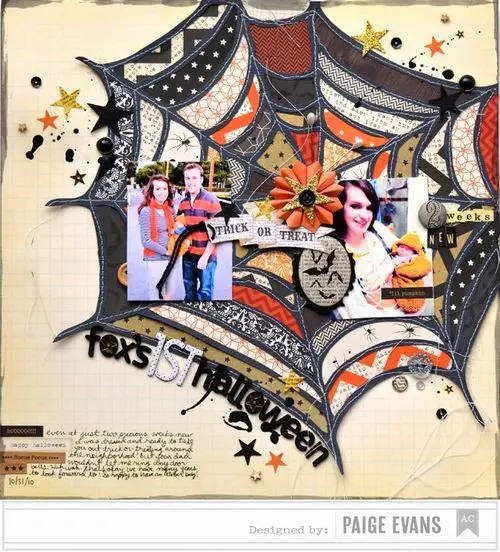
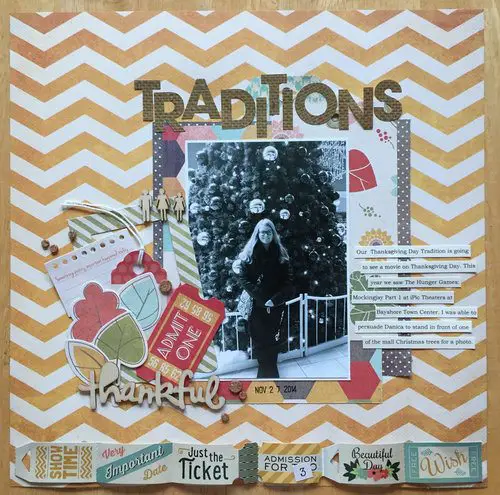
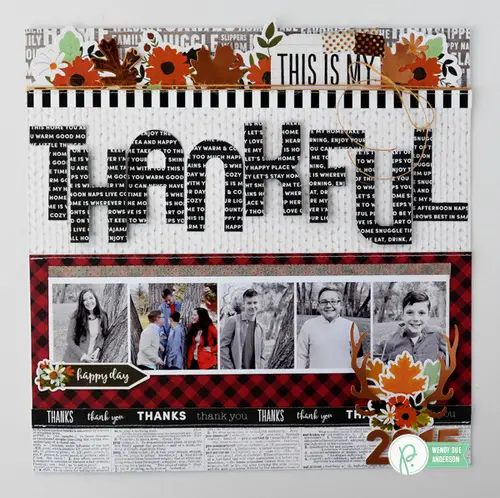
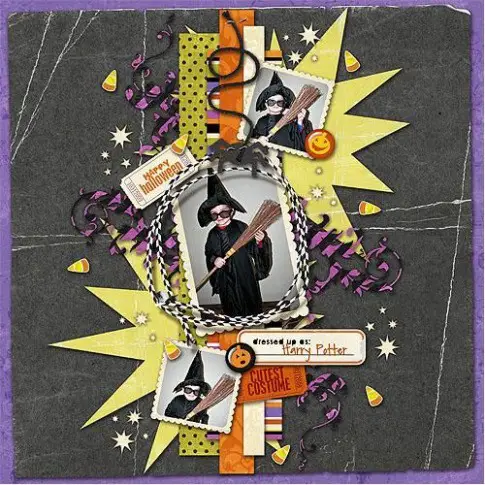
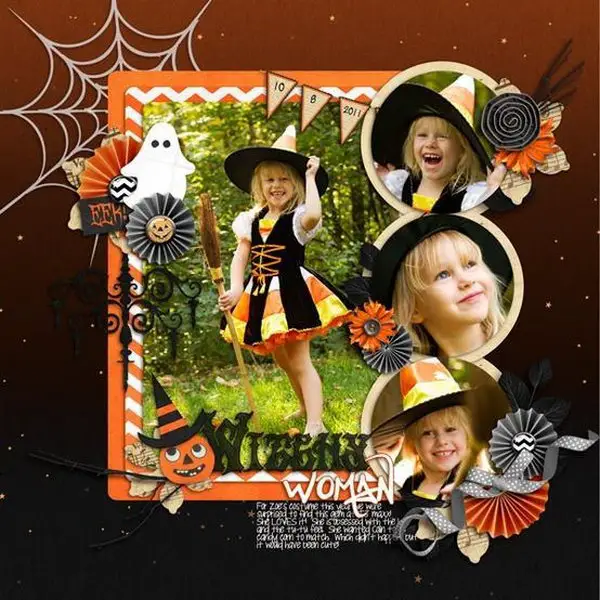
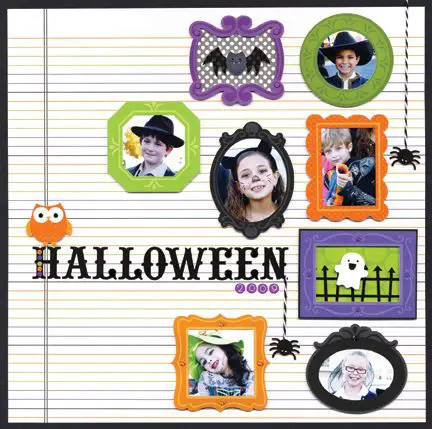
Showing her nice and a bit goofy smile, this girl is ready for a Thanksgiving pageant! I love the way that there’s one featured photo and that both photos are grouped together inside of a stitched circle swirl layered with all sorts of cut-out leaves. This creates dimension and movement on the page, a very nice effect!

Design element: Create movement on the page using flurries and swirls. In this case: A stitched swirl of autumn leaves!
Finishing Touch: The blue chevron pattern paper behind the two photos contrasts with the traditional Thanksgiving colors, creating a color pop and adding interest of the layout.
Cute detail: Well, you gotta love that featured photo! It is just too precious!

Document The Thanksgiving Dinner Cooks

Don’t forget to document all those wonderful people who cook all those delicious Thanksgiving meals for us! The cooks work so hard to prepare this annual turkey feast, spending days on end planning, grocery shopping, stirring pots and baisting birds in kitchens all over the land. Let’s celebrate their efforts and achievements and give them pride of place in our layouts!

Document the thanksgiving dinner cooks thanksgiving Layout Ideas Scrapbooking
Layout designed by Heidi Sonboul (Scrapbook.com)

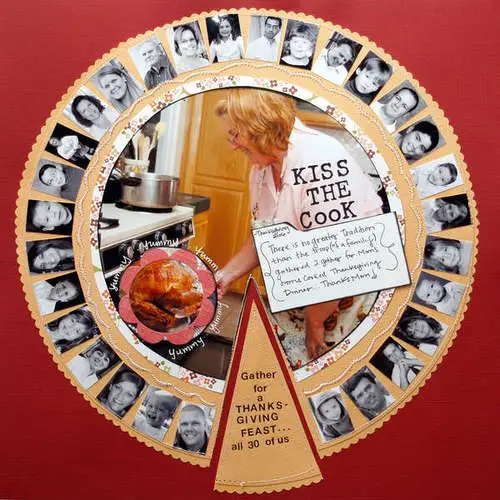
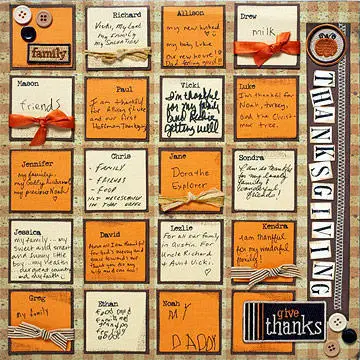
A whole “pumpkin pie” layout with the cook in the center and small black and white “passport-like” portrait photos depicting all the lucky family members who got to partake in the prepared dinner! What a great idea for documenting all the people present: so many photos on one page! I love the little piece of pie that is cut out and filled with journaling. 

Design element: Arrange a lot of small photos inside a pumpkin pie around a central photo.
Finishing touch: The journaling is done on one of those recipe index cards.
Cute detail: I love the “yummy’s” and the little flower frame around the turkey.

Document the thanksgiving dinner cooks thanksgiving Layout Ideas Scrapbooking
Source: Pinterest

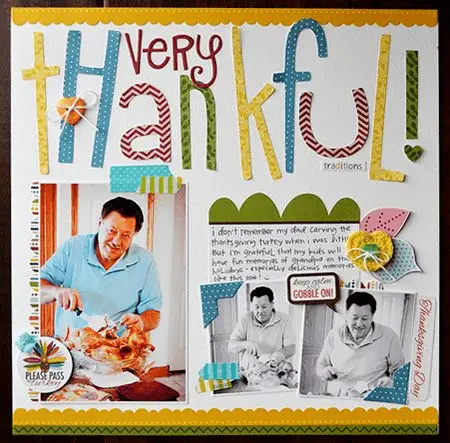
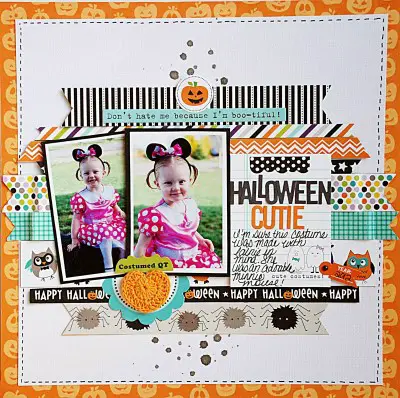
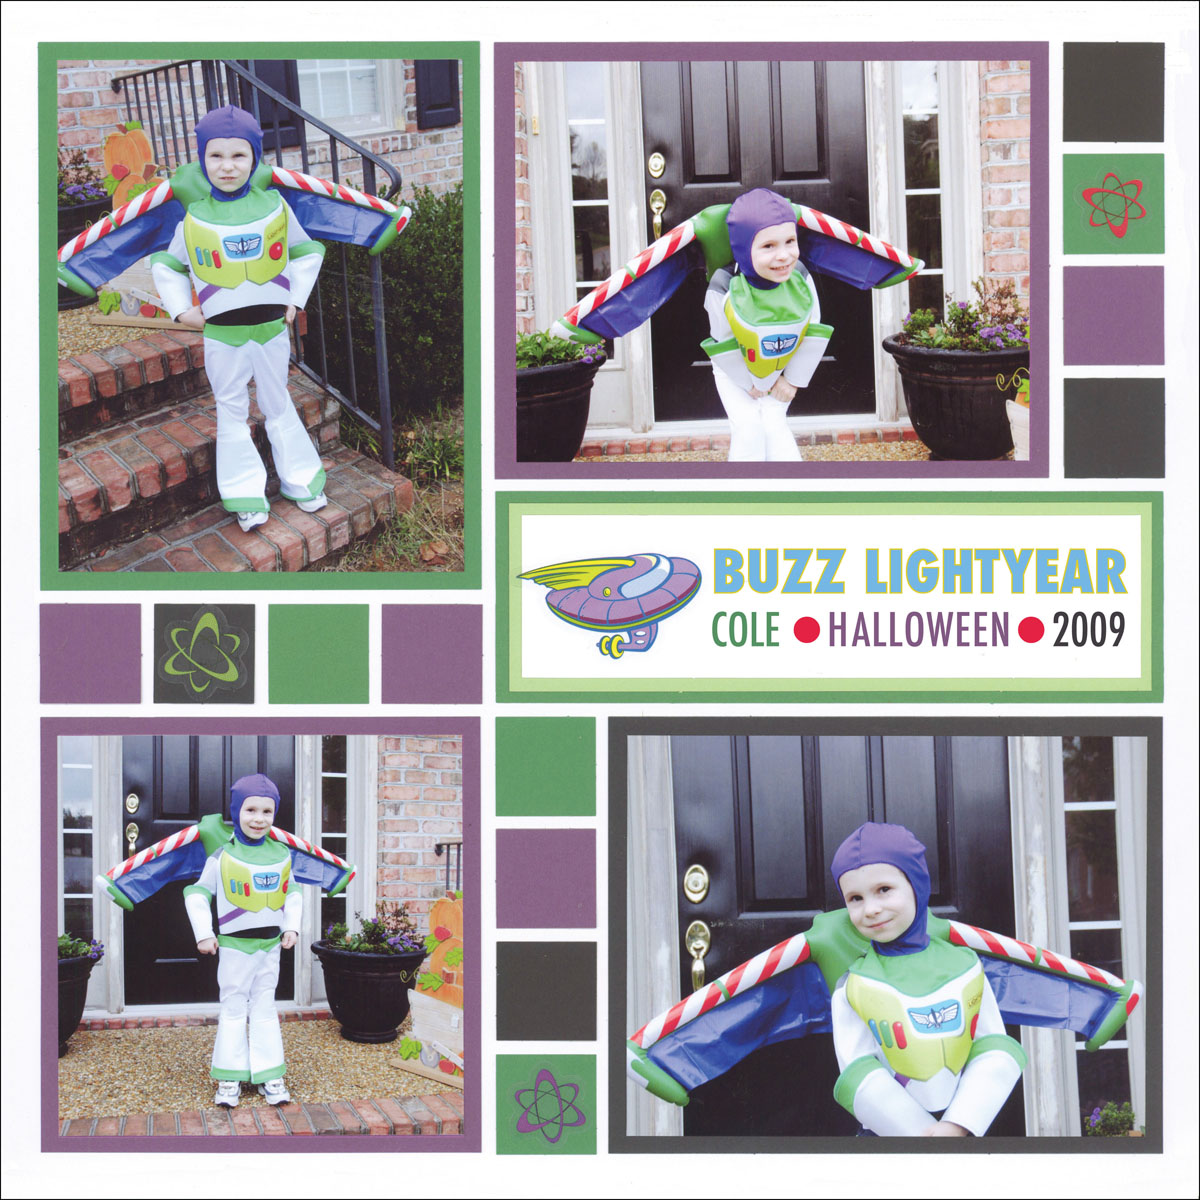
A colorful layout documenting the great turkey preparation tradition of this family! One big color photo, two smaller black and white photos and a large multicolor title. Small embellishments, mirroring the title colors, are the finishing touches. My personal favorite embellishment is the small yellow crochet heart with the little blue button. It’s so cute! Notice the subtle journaling describing the Thanksgiving turkey preparation in more detail.

Design element: Clearly showcase your featured photo by leaving it larger and in color, whilst making rest of the photos smaller and black and white.
Finishing touch: The colorful title made out of different patterned papers.
Cute detail: I love the yellow crochet heart!

Document the thanksgiving dinner cooks thanksgiving Layout Ideas Scrapbooking
Layout designed by Michelle Lewis

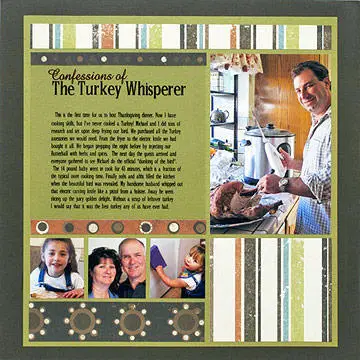
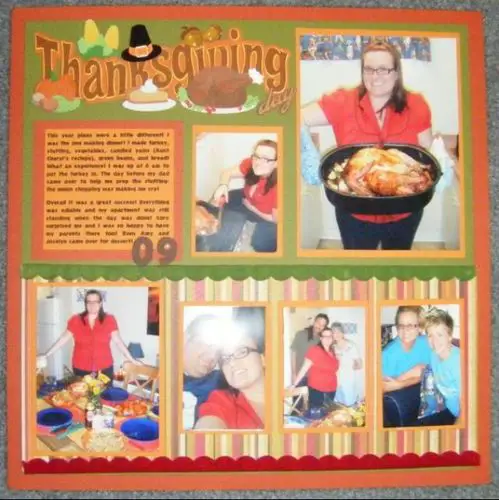
A simple grid style layout with some matting, some pattern paper and a lot of room for journaling. The chef, again, has pride of place in the featured image, but the happy eaters are certainly not forgotten! I love the title “The Turkey Whisperer”!

Design element: If you have a lot of journaling keep the rest of your layout simple.
Finishing touch: The chosen patterned paper matches the color scheme of the photos beautifully.
Cute detail: I love the little circles of patterned paper.

Document The Thanksgiving Food

Thanksgiving wouldn’t be Thanksgiving without all the gorgeous food! So make sure to not forget to document all the goodies that make Thanksgiving so yummy and special! Let’s look at some layouts that celebrate all the lovely nomnoms!

document the thanksgiving food preparation thanksgiving Layout Ideas Scrapbooking
Layout designed by Summer Fullerton

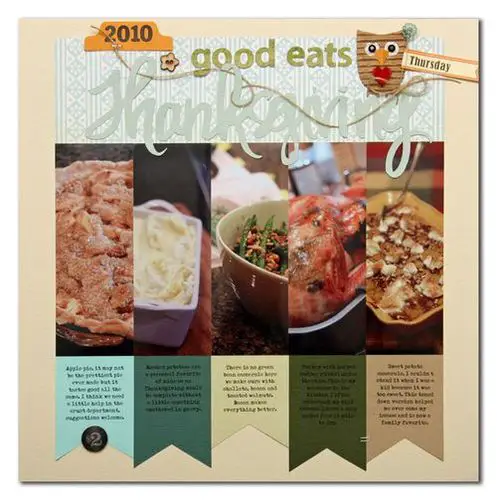
This first food-related layout is a fairly straight forward grid type page. The photos of the food are displayed in vertically oriented closeups and each dish has a little banner with some journaling details on it. Using only partial photos is a very good idea, especially because it is very difficult to take a good (and, more importantly, tasty-looking) photo of food. By zooming in and cropping the plate, the food immediately looks more appetizing and it saves a lot of space on the page. 

Design element: Use close-ups of your food and crop them vertically to show only part of the photo. This makes your food look more appetizing.
Finishing touch: The cut-out “Thanksgiving” title is a very subtle shade of the pattern paper underneath. This focuses the eye on the photos and not on the title.
Cute detail: The little owl with the big heart!

document the thanksgiving food preparation thanksgiving Layout Ideas Scrapbooking
Layout designed by xboxmom

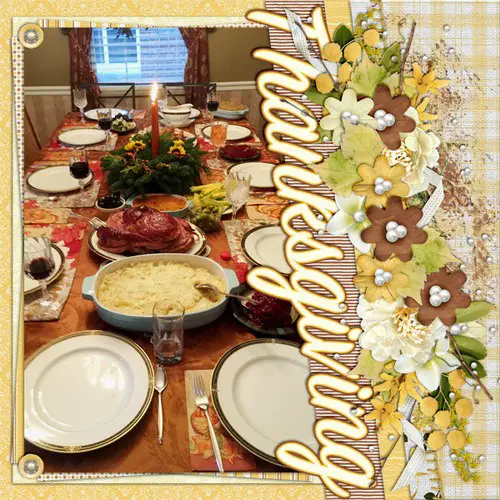
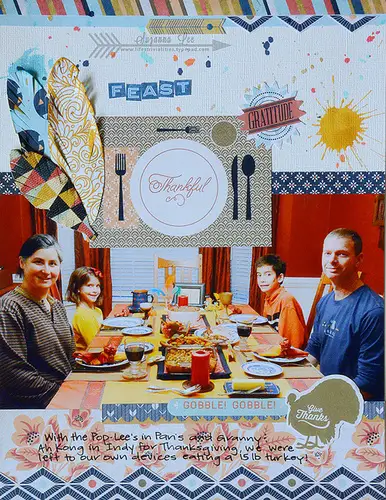
This layout celebrates the food and the lovingly set dinner table. The photo is vertically oriented, making it possible to flank it with a big vertical title and an abundant cluster of color-coordinated flowers. These elements are added in a slightly tilted angle, giving the layout a playful finish.

Design element: When using a vertical picture, angle your title and patterned paper cluster overlay to give your layout a more playful look.
Finishing touch: The beautifully color-coordinated flower cluster.
Cute detail: I love the little brads in the corners of the photos. Together with the title they form a sort of design triangle.

document the thanksgiving food preparation thanksgiving Layout Ideas Scrapbooking
Layout designed by Jennifer Perks

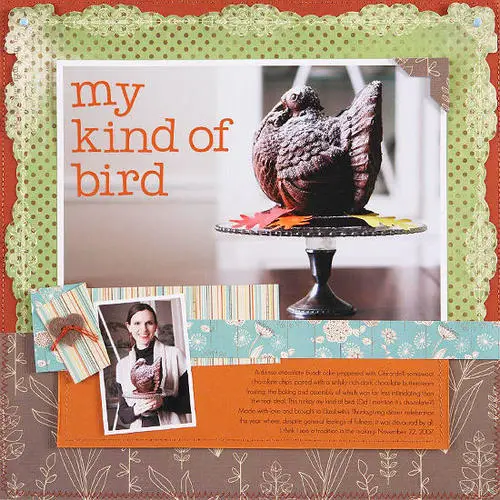
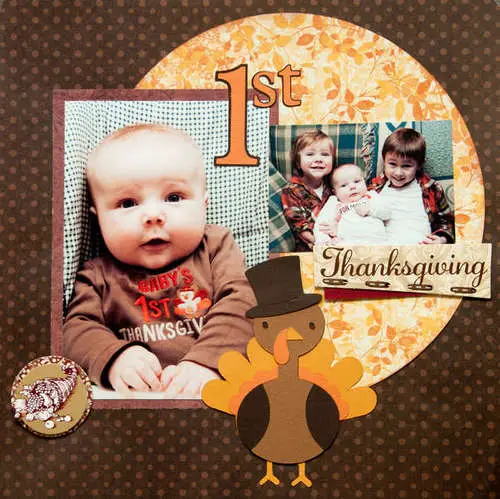
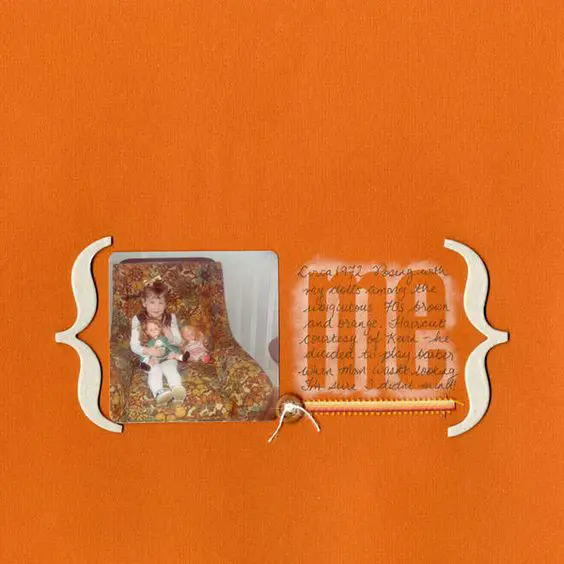
I’m not exactly sure if this turkey is made out of chocolate, but I’m sure the creator of this layout has explained it all in her journaling. I love that she included a closeup op the bird itself and one of herself holding the precious item. The layout is simple and straightforward with a clear emphasis on the main photo. Notice how the title color matches not only with the journalling background, but also with some orange details on the main photos. This creates another one of those “design triangles”!

Design element: Give your Thanksgiving food creation pride of place! Finishing touch: I love the color choice of the title.
Cute detail: The blue strip of flower pattern paper offsets the more traditional Thanksgiving colors beautifully.

document the thanksgiving food preparation thanksgiving Layout Ideas Scrapbooking
Source: homecookingmemories.com

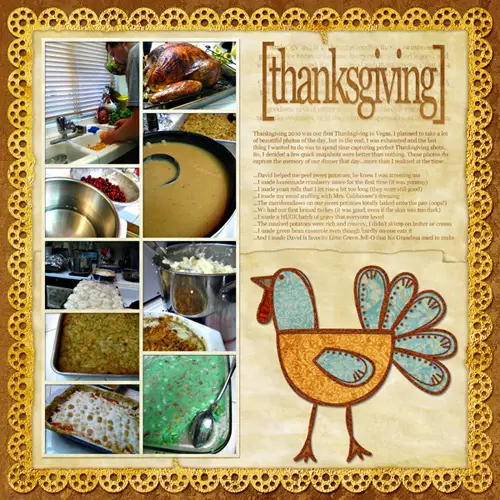
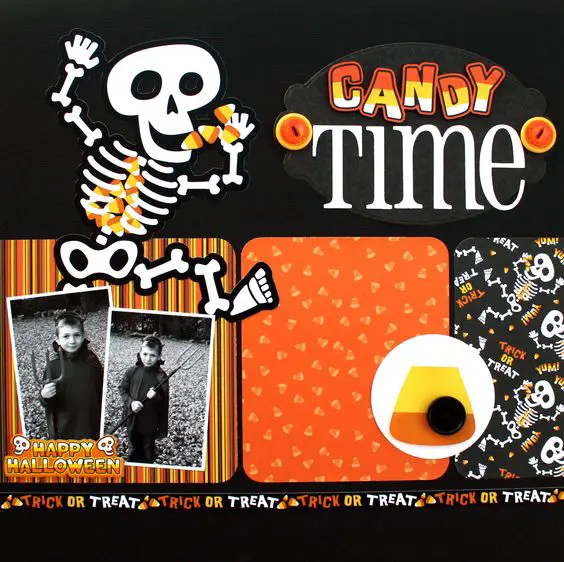
This layout fills one half the page with a photo grid and the other half with the title (love those brackets!), journaling and a cute turkey embellishment. Again, cropped closeups were used to highlight the food, making it all look as yummy as it undoubtedly tasted. The visually ” busy” photo page half is beautifully balanced by the restful ton-sur-ton title and journalling. Any other color would have been a bad choice as it would have been too dominant and drawn the eye towards the words, rather than the photos. The stylized turkey drawing fits in with this muted color scheme very well and (in digital scrapbooking) can be size-adjusted easily to fit the space left over after the journaling is done. 

Design element:  Grid the close-ups of your food photos together on one side of the page.
Finishing touch: The tone-on-tone color of the title and journaling give the illusion of white space on the right side of the layout.
Cute detail: The blue feathered turkey embellishment!

document the thanksgiving food preparation thanksgiving Layout Ideas Scrapbooking
Layout designed by IzzyB (Scrapbook.com)

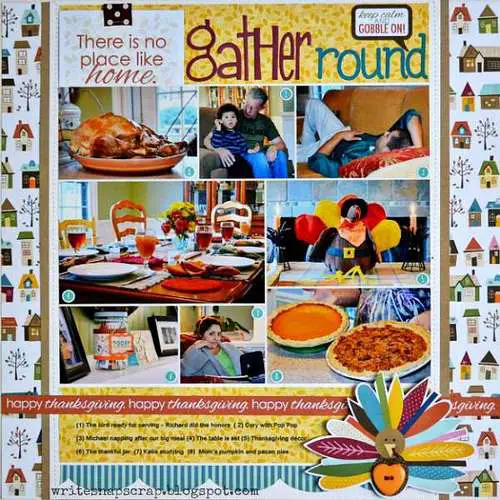
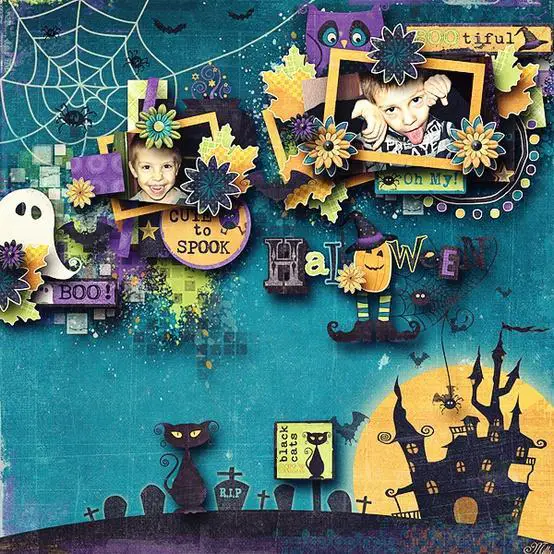
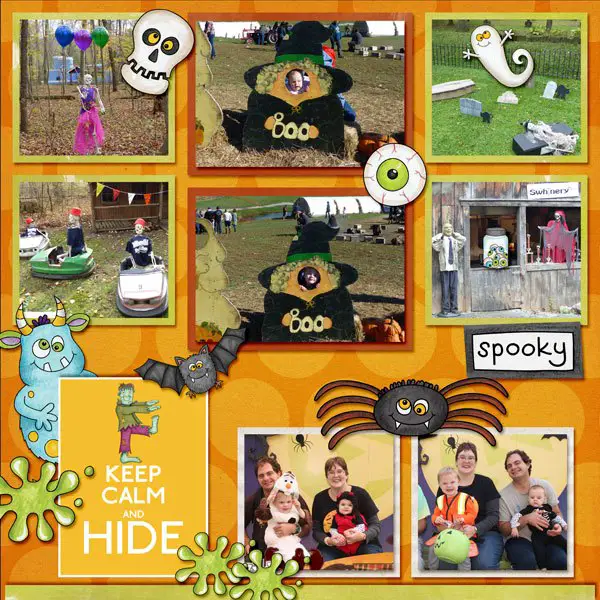
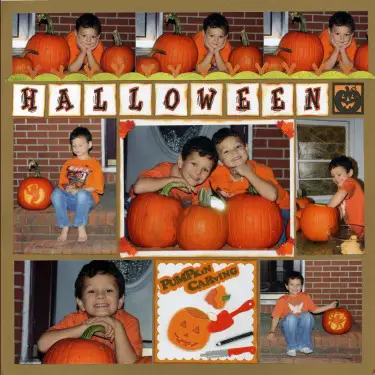
This layout radiates happiness and joy! It is very colorful and filled to the brim with different elements. I personally would have chosen to leave a little bit of white space around the photo area, in stead of the (cute!) little houses pattern paper, whereby focussing a little  more clearly on the photos. I love the colorful little turkey embellishment and the combination of food and “around the home” shots documented on this page. 

Design element: Just go overboard and put everything you love about Thanksgiving on the page: the people, the food, the turkey centerpiece. Create a page that makes you happy!
Finishing touch: The photos are numbered to enable journaling about the individual photos elsewhere on the page.
Cute detail: The colorful turkey embellishment with the heart button.

document the thanksgiving food preparation thanksgiving Layout Ideas Scrapbooking
Layout designed by Stacy Cohen (Scrapbook.com)

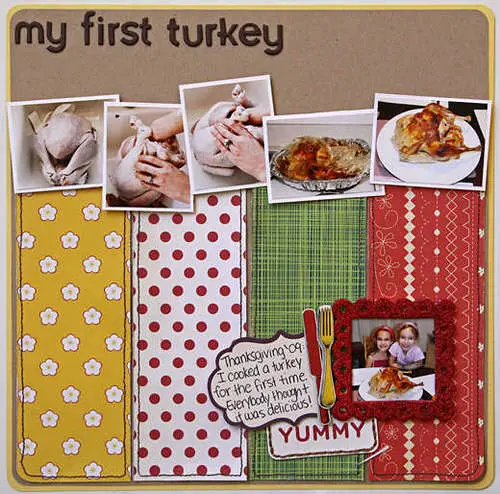
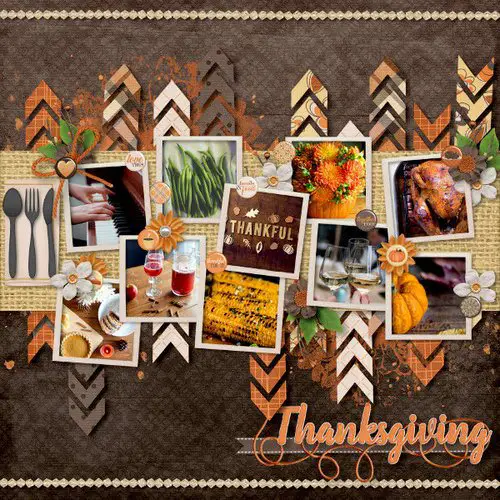
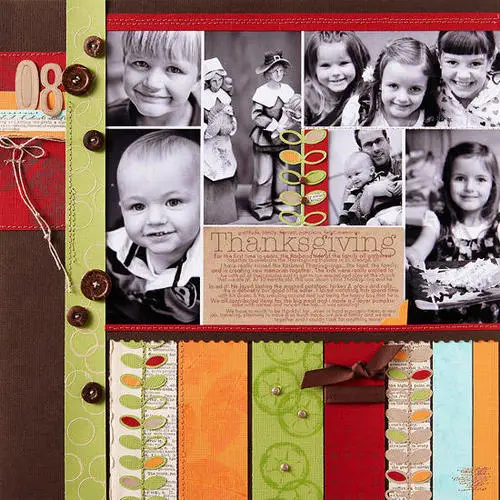
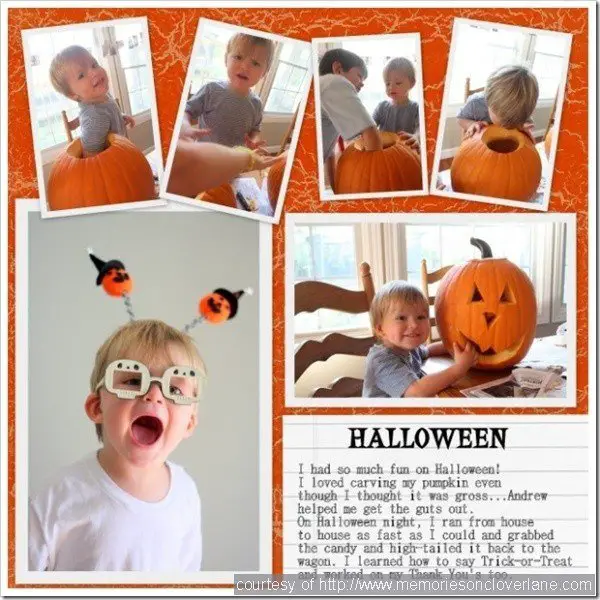
What a great idea to document the first turkey ever prepared! I love the step-by-step photos, complete with the gorgeous golden brown final result and the photo of the happy eaters! The page derives its color from the four columns of pattern pater, each carefully border-stitched. A little frame was added to the finished turkey photo, complete with fork and knife embellishments. We’re all ready to dig in!

Design element: Keep your food preparation photos small and bring a pop of color using patterned paper.
Finishing touch: The cute frame around the people enjoying that first turkey!
Cute detail: I love the little knife and fork next to the journaling.

document the thanksgiving food preparation thanksgiving Layout Ideas Scrapbooking
Layout designed by Mrsmiller, scrapbook.com

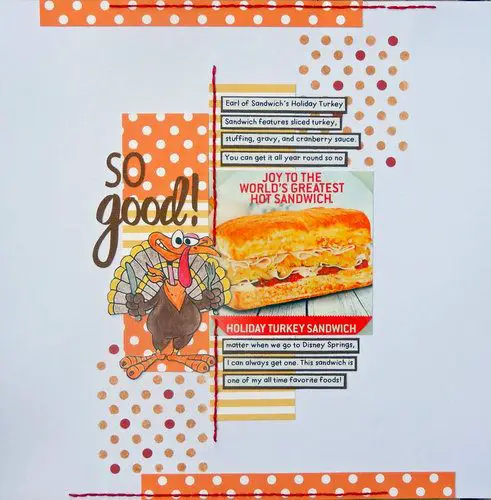
The sandwich looks absolutely scrumptious and is clearly this page creator’s favorite. This particular turkey sandwich is not directly linked to Thanksgiving (other than the turkey component), but it is a great idea for a layout to celebrate the Thanksgiving dinner leftovers! I love the polka dots and the journaling strips!

Design element: Keep your layout simple and balanced by not using too many colors or too many types of patterned paper.
Finishing touch: Wow, that turkey sandwich looks scrumptious!
Cute detail: The vertical stitching on the left-hand side of the photo and journaling.

Halloween Scrapbook Layout Ideas – Part 2


Halloween Layout Ideas Scrapbooking

Here’s part 2 of the Halloween Scrapbook Layout Ideas! Curious about part 1? Click THIS LINK to get there!

When it comes to Halloween, there is no shortage of ideas for awesome Halloween scrapbook layouts. Let’s scroll down together for some design inspiration and perhaps even to see some Halloween scrapbook pages to scraplift? Your Halloween photos deserve to be on the best Halloween layouts you can create and this article will help you find the perfect Halloween page inspiration!

Traditional Halloween Pages Halloween Layout Ideas

To get into the proper Halloween scrapbooking mood, let’s take a look at some more “traditional” pages! Break out your Halloween scrapbooking supplies (love that orange!) and scrap away.

Traditional Halloween Pages Halloween Layout Ideas Scrapbooking
Source: scrappingwithchristine.blogspot.com

This lovely layout is pretty straightforward: a nice grid-type strip of small Halloween costumed photos decorated with a big title and accents in the traditional Halloween colors. And really, what more does a layout really need? To point out a cute detail: don’t you just love how the white tag is turned into a little ghost, simply by adding some googly eyes?

Traditional  Halloween  Pages Halloween Layout Ideas Scrapbooking

Layout designed by Kaye222 (Scrapbook.com)

I love the focus on the photo in this layout. The color scheme is kept simple and traditional, which makes it possible to cluster a lot of embellishments together without the cluster getting overwhelming or taking away the focus of the photo. I love the different types of swirls that are added to this page: the paper cut-outs and the glued on enamel dot swirls. 

Traditional  Halloween  Pages Halloween Layout Ideas Scrapbooking
Source: Pinterest

You can’t go wrong with some pumpkin patch action on your Halloween layouts. The photos are the stars in this simple grid-like layout. It would be a great type of layout to put into your Project Life or other pocket page scrapbook! Lovely close-ups of all the family members combined with a little bit of journaling: classic!T The different color buttons added to this page are the perfect finishing touch!

Traditional  Halloween  Pages Halloween Layout Ideas Scrapbooking
Source: Pinterest

I love that the photo is color-adjusted to fit the chosen color scheme. The choice of embellishments has been simple and refined and there is some journaling to fully document this cute little tiger’s Halloween! The grungy look of the paper and embellishments add to the atmosphere of the page. 

Traditional  Halloween  Pages Halloween Layout Ideas Scrapbooking
Source: Pinterest

Time for some furry Halloween layouts! In this layout, the photo is the focus point, together with the orange title popping on the page. The pattern paper in the background (both the circle with chevron stripes and the square piece with the gold stars) are not specific Halloween papers, showing you can use any paper you want for any layout you choose! The little orange gauze border combines well with the orange “Spook” title. I love how the embellishments and title are on top of the photo, emphasizing the dog as the focal point!

Traditional  Halloween  Pages Halloween Layout Ideas Scrapbooking
Source: Pinterest

Another furry layout: cats seem to be a natural match for Halloween layouts! Combining the gray cat with the exuberant orange pumpkin is a stroke of genius and this photo sets the tone for this layout. Polka dots and lace are masterfully combined on this scrapbook page.

Traditional Halloween Pages Halloween Layout Ideas Scrapbooking
Source: Life with Evi

Two furry friends posing in their awesome Halloween kerchiefs! The photo is put at a slight angle on the straight striped background. The big spider web, together with the title and some other small embellishments are framed around the photo, making the dogs the stars! I love the little ghost and pumpkin!

Traditional  Halloween  Pages Halloween Layout Ideas Scrapbooking
Source: Pinterest

On one side of the page busy Halloween photos, on the other side “white” space (well, actually cute orange flowery paper…) and some cute embellishments. What a great way to get photos on a page without having to choose one as the main photo. Spreading these photos out on the page could have resulted in utter chaos. The orange polka dot flower in the right-hand corner mirrors the orange pattern paper side and this pulls the whole layout together. And look at the kids’ scary faces! Adorable!

Traditional  Halloween  Pages Halloween Layout Ideas Scrapbooking
Source: Pinterest

I love two-page spreads. They are a great way of putting lots of photos on your layouts! This layout is able to combine four small square photos with two vertical and two horizontal photos. Ánd it has enough room for some lovely embellishments and accents! That orange title and polka dot paper bring some extra color pop to an already very colorful layout!

Traditional  Halloween  Pages Halloween Layout Ideas Scrapbooking
Source: Pinterest

Another double pager, this time with two very different color schemes! Each side is sporting one large black and white photo (color popping against some toxic orange and green!), a large title and very few embellishments. Simple can be Halloween awesome!

Unusual Halloween Colors

There really is no rule stating you should only use the traditional Halloween colors of orange, purple, green and black on your Halloween pages. Why not go for something a little different this year? Let’s take a look at how some of our fellow scrappers have chosen completely non-traditional color schemes to celebrate their Halloween photos!

Unusual Halloween Colors Halloween Layout Ideas Scrapbooking
Source Pinterest

I love this layout: it is a very minimal looking page using the unusual Halloween colors of mainly pink and white. Don’t you just love the way that the top of the page is divided into four triangle segments meeting in the middle? It’s such an unusual way of making any layout. Of course, there are the more traditional types of elements like the spider web, the little bats, pumpkins and the title “Boo”. The photo itself fits the minimalistic look and despite not being so big still draws the eye on the page. All in all a very cool layout!

Unusual Halloween Colors Halloween Layout Ideas Scrapbooking
Layout designed by Paije Rodriguez

This layout is yet completely different again! In this case, very bright happy colors were used. I love that bright yellow! This choice of color really fits well with the subject of the photos that are very brightly colored themselves. The photos are framed in happy colors and little colorful squares are added between the photos for a completely unexpected looking Halloween page!

Unusual Halloween Colors Halloween Layout Ideas Scrapbooking
Layout by Mary-Ann Maldonado

If your Halloween outfit is as colorful as that of a minion, you can take that yellow and run with it on your page! That’s exactly what the creator of this layout has done. The yellow of the cute minion costume is mirrored in background paper and different color boxes of scrapbooking embellishments. I love the use of black in this layout: beside the black title there are little strips of black scrapbook paper tucked behind some of the corners of the photos. These little strips create a whimsical and fun look. And, let’s face it, the black and white polka dot pattern paper is just perfect!

Unusual Halloween Colors Halloween Layout Ideas Scrapbooking
Source: Pinterest

Yet another completely different Halloween layout is this “Bikers And Clowns” page. I had to look twice at the clown, I think he’s seriously creepy. Fortunately the girl doesn’t seem to think so! I love the way that the page is split in two emphasizing the difference in Halloween costumes. To both sides a little journalling is added. The layout itself is fairly straightforward and rather minimal and does not include traditional any colors that are traditionally associated with Halloween. So if you have photos that don’t really fit that orange-purple-green- black color scheme, don’t fret and just make up your unique Halloween page!

Use Cute Halloween Embellishments

A large part of the fun of making a Halloween scrapbook page is using all those cute, funny, and sometimes actually scary Halloween-style embellishments. Let’s be honest with each other for just a moment: sometimes the only reason that we want to make a Halloween page in the first place is that we can include our favorite black cats, little ghosts and ghouls! Halloween is a great excuse to get those Halloween supplies out and go for it! Let’s take a look at how other scrapbookers have used the some of their favorite Halloween embellishments!

Use Cute Halloween Embellishments Halloween Layout Ideas Scrapbooking
Source: Pinterest

This first page is a great example of using Halloween embellishments! You almost have to search for the actual photos included! I love the look of this page. The used elements are so cute and they cluster very well together. The clusters around the two small photos are  beautifully balanced with the spiderweb, and the white spider web anchors the floating clusters to the to the edge of the page. On the bottom of the page, the little haunted house and black cat leave some much needed white space. If you got those cute little Halloween embellishments just go for it and use them all up!

Use Cute Halloween Embellishments Halloween Layout Ideas Scrapbooking
Layout designed by Kim Watson

This layout is a more subdued way of using Halloween embellishments. I love the grid structure of this page. All the squares are filled with either cute embellishments or cute photos. All the traditional Halloween characters have their place in this awesome layout: the ghosts, the pumpkin, bat, cauldron, candy corn etc etc etc! I love the way that some of the elements are filled with sequins or little colourful beads, and who can resist putting googly eyes on things? They always bring such a fun element to to a scrapbook page. But let’s not forget about the photos: the two kids are very cute in their Halloween outfits! This whole page is a fantastic way remembering fun, whimsical and super-cool Halloween!

Use Cute Halloween Embellishments Halloween Layout Ideas Scrapbooking
Source: Pinterest

This page has a completely different look. A photo grid is used and the Halloween embellishments are placed in between or on top of the photos These drawn Halloween characters are so much fun! My personal favorite is the little bat, but the little googly eyed skull, spider, ghost and monster are super cute as well! Such a fun way to decorate your Halloween pages!

Use Light Clusters

I want to include a couple of layouts that show that having a Halloween themed page doesn’t mean that it to be dark, gloomy, spooky and grim. Let’s take a look at the following pages showing that keeping your clusters light and keeping your page light and bright you can still create a fairly traditional looking Halloween page!

Use Light Clusters Halloween Layout Ideas Scrapbooking
Layout designed by Gina Lideros

This first layout is the perfect example of use of light colored clusters. Traditional Halloween colors are used. Black and orange light clusters are achieved by using cut-out spiderwebs. Even though the spiderweb is itself is black, being able to see the light background colors through the cut-outs still creates a light and airy feel. I love the way the letters of the “Halloween” title are spread out on the page. The letters are quite big and dark, but by putting them all in different places and not all together the light feel of the page is maintained. The two photos of the cute kids with their costumes are very light, bright and colorful themselves, and they really get to shine in this light and bright Halloween layout!

Use Light Clusters Halloween Layout Ideas Scrapbooking
Layout designed by Jana Eubank

The second layout is quite a different type of page, but still the overall feel of the page is light and bright. It is unmistakably a Halloween page, as it is all about pumpkins, scarecrows and all the fun that we can have in the fall and on Halloween. The photos and the page elements are clustered together in the center. By doing this you can create a lot of white space on the page. The page elements are color coordinated, with a heavy emphasis on the browns and oranges. This also helps to give the page a unified look.

Use Light Clusters Halloween Layout Ideas Scrapbooking
hSource: jenniferhignite.blogspot.com

I love this page: It’s such an unusual look for Halloween! Finding the little baby amongst the gorgeous flowers and other page elements is almost a surprise! This kid is so cute! I love the way that the embellishments are arranged. It’s such a cool way of mixing techniques. There’s a little bit of stamping, some paint splattering, and of course, those awesome brown-orange flowers. Notice the little beige colored gears that are clusters on different places on the page. It gives the page a bit of a steampunk vibe, while still keeping it very light and bright.

Use Light Clusters Halloween Layout Ideas Scrapbooking
Source: Pinterest

This page is just a lot of fun! The black and white photo of the two kids with their little Halloween faces is beautifully clustered with some colorful triangle banners and some cute pumpkins. I love the way that the title “Wicked” are white chipboard letters on a white background. This gives a wonderful dimension to the page but still keeping it very light and bright and prevents the title dominating the page. Notice the little cute spider at the top of the page and the cute little heart with a very subtle journaling in the left bottom corner of the page. The paint splatters all around give a lovely playful look to this cute page.

Use Light Clusters Halloween Layout Ideas Scrapbooking
Source: beckiadams.blogspot.com

This Halloween cutie certainly deserves a page of her own! Dressed as Minnie Mouse in a lovely pink outfit she is ready for some trick or treating! Again, this page is kept very light and bright by clustering all the page elements in the center, and by putting everything on a light background. There sure is a lot to see! The little spider banner is very cute are the little Owls, but my personal favorite is the crochet heart and the “Costumed Cutie” title. Such a fun idea for a light and bright and very cute Halloween page!

Use One Big Design Element As The Backdrop For Your Photos

Instead of clustering together many small elements you can also use a big, almost page filling, element as the backdrop for your photos. Let’s take a look at some examples of pages that are dominated not only by the wonderful photos but also by the big stylized elements!

Use One Big Design Element As The Backdrop For Your Photos Halloween Layout Ideas Scrapbooking
Source: scrappingwithchristine.blogspot.com

This first scrapbook page is a great example of using larger page elements. The cute little puppy photos are very adorable and are beautifully balanced with the big “Boo” title and a big colorful spider web. The color scheme is traditional for Halloween, but especially the green and orange are of a super bright variety. Notice the little googly eyes in the “O’s” of the title: very cute!

Use One Big Design Element As The Backdrop For Your Photos Halloween Layout Ideas Scrapbooking
Source: simplykellydesigns.com

It’s not very difficult to guess what the big stylized element on this page is. This massive pumpkin with cut-outs is used as the backdrop for the photos. I love this enabled the creator of this page to include a lot of different photos on this page. The left-over cut-outs are filled with journaling and some cute orange patterned paper. Using such a page filling element is such a fun way to spruce up your photo grid! The great thing about it is that you can use this idea over and over with different types of big elements: large pumpkin, large candy corn, large ghost etc etc etc!

Use One Big Design Element As The Backdrop For Your Photos Halloween Layout Ideas Scrapbooking
Source: Pinterest

I love this layout: it has such a wonderful gothic Halloween look to it. The big grey spiderweb background, together with the gorgeous cluster of bats give an immediate spooky feel to this layout. The grey background makes the photo colors truly pop. It’s just a perfect layout for this photo! I love the gothic elements of the the witches brew bottles, the skull and bones, and the quite fierce looking owl. The orange color pop of the little girls beautiful hair is mirrored in the title “You Cast A Spell On Me”.

Use One Big Design Element As The Backdrop For Your Photos Halloween Layout Ideas Scrapbooking
Layout designed by Paige Evans

The big stylized element of this page is an awesome spiderweb with different cut-outs. These cut-outs are filled with different kinds of pattern paper, matched in a distinct color scheme. The papers are repeated in different parts of the spider web. The two photos, together with some other embellishments, are clustered on top of the web. All the page elements are put on a light background, giving room to lots of white space. Having all this white space make the spider web stand out even more. Did you notice that the spider web is completely stitched to this page? How cool is that! And to give a little bit more of a Halloween  spider web look, some of the threads of the stitching are left dangling. 

Use One Big Design Element As The Backdrop For Your Photos Halloween Layout Ideas Scrapbooking
Source: Pinterest

“Bewitching” indeed! This layout is dominated by the photo and one large stylized flower made of scrapbook paper. The colors of the flower petals fit beautifully with the colors of the little girl’s witch outfit. The color pop created by both the photo and the flower is made possible by the simple grey background. Notice how the title has different kinds of letters in it, making the “witch” part stand out. Also notice how the journaling is put on strips of paper, adding another embellishing element to the page. Finishing touches are the rhinestones in the centre of the flower and the little flowers stamped in the upper left hand corner of the photo.

Use One Big Design Element As The Backdrop For Your Photos Halloween Layout Ideas Scrapbooking
Source: www.meandmybigideas.com

This last layout is a completely different example of using big stylized page elements as the backdrop for your photo. On this page, big triangles of different Halloween patterned papers are used to create a grid. This grid forms the background for the photo and the title. I love the color scheme! The photo itself is fairly black and white, and the pops of orange from the triangles complement is photo perfectly. I love that the title is made out of two different colors and that there’s a little bit of color pop coming from the leaf clusters surrounding the photo. The finishing touch is the thin long black and white chevron strip of paper across the top of the page, tying the whole thing together. Noticed the zigzag stitching around the page elements, such a cool idea!

Thanksgiving Scrapbook Layout Ideas & Inspiration – Part 1


thanksgiving scrapbook layout ideas

Thanksgiving! What a great holiday to celebrate! And what a great opportunity to document your gratitude for family and life in your scrapbook pages. Need some inspiration to get your creative Thanksgiving-layout-making juices flowing? Well, look no further! 

I’ve searched the internet to find some awesome, creative, unique and unusual Thanksgiving scrapbook layouts. So, let’s get inspired together!

Document Your Unique Family Thanksgiving Traditions

Not everybody celebrates Thanksgiving the same way. Some families have cultivated their own specific Turkey Day traditions. Does this sound like you and your family? In that case, it is even more important to document your unique Thanksgiving celebrations! Make sure all the memories and traditions of your particular Thanksgiving day are preserved and documented. Let’s take a look at some of the specific traditions (and how they are documented) of other families!

document your family thanksgiving traditions thanksgiving Layout Ideas Scrapbooking
Layout by Celeste Smith

This lovely layout documents the family’s tradition of putting on their pajamas right after Thanksgiving dinner. The photo is so cute and fun! I love how the title “pajamas” is made out of felt letters. This adds some real coziness to the layout. The photo itself is turned to black and white and both the photo and title are matted by a lovely duck egg blue colored paper with little black polka dots. Pattern paper is added to the title, photo and journaling cluster. Notice the little detail of the clock embellishment giving the time that the photo was taken! This is a cute detail that adds to the memories and the story of this family’s Thanksgiving traditions.

Design elements: Journaling about family traditions on Thanksgiving Day.
Finishing touches: “Pajamas” title made out of felt letters.
Cute details: Little clock embellishment showing the time the photo was taken. The exact time is also noted in the little tag on the left side.

document your family thanksgiving traditions thanksgiving Layout Ideas Scrapbooking
Layout by BethB625 (Scrapbook.com)

The family traditions of the creator of this lovely layout consist of going to a movie on Thanksgiving Day. This movie going tradition is documented by showing a lovely photograph of one of the participants and clustering some ticket embellishments around the page. I love the big “traditions” title, making this page a bit more usual and non-traditional for Thanksgiving, but still fitting their own tradition. I’m a big fan of the muted, but colorful, background and layered cluster of embellishments. Notice the little wooden cutouts of the word “thankful” and of the little people indicating the number of people participating in their movie going activity. I love those kinds of subtle additions to a page: they make a layout very personal and contribute to the memory keeping. And finally: really now, who can resist a lovely yellow chevron stripe?

Design elements: Embellishing the page with movie ticket stubs.
Finishing touches: The strips of journalling.
Cute details: The three wooden cut-out people showing who went to the movies.

Journal About What You Are Thankful For

Thanksgiving is a wonderful holiday to think about document all the things in your life that you are thankful for. Studies have shown that being grateful can be a very positive influence on your life, and the Thanksgiving holiday is a great opportunity to not only write down what you are thankful for but to get more creative and make a whole layout around the topic.

journal about what you are thankful for thanksgiving Layout Ideas Scrapbooking
Layout by Cari Locken

This cute layout has a very fitting title: “Give Thanks With A Grateful Heart”, and it documents all the things that the creator of this page is thankful for. The journaling is done in a very creative way: using die cuts, hearts and stamps. This makes the journaling box an actual design element of the page. I love the way that the colors come from a matching set of Thanksgiving or fall papers, with pumpkins and a muted flower pattern paper. Even with all this color, the main subjects still are the black and white photos of her family, taking pride of place in the banner across the top of the page.

Design elements: Creative way of using several embellishments in the journaling.
Finishing touches: The cute embellishments spread along the bottom of the page.
Cute details: The little heart in the cloud die cut.

journal about what you are thankful for thanksgiving Layout Ideas Scrapbooking

Layout by Jennifer Stewart

Another way of documenting all the things that your family is grateful for, is to have them write it down on a small piece of cardstock. In this layout, the creator used a grid to showcase all those little square pieces of thankfulness. She typed in all the names of the people. Don’t you just love this idea? It is great to have people write it down, because then you not only get to document what they are grateful for, but also their handwriting! Almost all the squares are filled. The ones in the top left and in the low right corner are filled with some fitting embellishments, emphasizing what the page is all about.

Design elements: Grid layout of handwritten notes of gratitude.
Finishing touches: The little bows put around some of the squares that have a little white space.
Cute details: The little embroidered pumpkin near the title.

journal about what you are thankful for thanksgiving Layout Ideas Scrapbooking
Source: Pinterest

The creator of this lovely page went all out with the leaves embellishments! The layout has a fairly straightforward look with the journaling strips on top, the black and white photo of her family taking pride of place in the middle and some pattern paper on the bottom to balance out the design. The flurry of leaves across the layout adds a wonderful playfulness to the page.

Design element: The flurry of leaves give this straightforward layout a playful look.
Finishing touches: Leaf banners were used to frame both sides of the page.
Cute details: Who can resist the cute owl? It balances the “give thanks” element perfectly!

journal about what you are thankful for thanksgiving Layout Ideas Scrapbooking

Layout by Michelle Rubin

I absolutely love this layout! It’s a straightforward grid, that not only includes the written notes of gratitude, but also the photo of the family members themselves! It’s a wonderful way to document your family’s Thanksgiving. And it’s a great way to remind yourself of all the things your different family members are grateful for. I love the simplicity of this idea, and it’s execution. The photo grid on top and the bottom very minimally embellished with a little strip of patterned paper and two circles with little buttons. And the title just says it all!

Design element: A simple grid that enables the photos to tell the story.
Finishing touches: The chosen color pallet helps the photos to stand out more.
Cute details: The cut-out circles with the buttons in the middle add the perfect detail.

journal about what you are thankful for thanksgiving Layout Ideas Scrapbooking

Layout by Sophie Crespy

The creator of this layout lists five reasons to be thankful, and she goes on to list those five reasons in separate journaling strips, embellished different pattern paper strips. It might be difficult to read the French journaling, but it’s reasonable to assume that her reasons to be thankful have to do with those cute kids in the photos! She uses two different sizes for the photos, adding a little playfulness. The way that the layout is set up clearly makes these photos the star. Notice how the sewn circle clusters make one of those designer triangles!

Design elements: Using different strips of patterned paper to embellish separate journalling strips.
Finishing touches: Circles are sewn on some of the pattern paper strips to make the layout more playful.
Cute detail: I love the little stables that were put in the title and in the little tag above the photos.

Make The Photo The Star

It has been mentioned a couple of times already: some layouts are designed specifically to make your photo shine! This is a little bit easier if you have only one photo on the page, but it’s still possible to make one of the photos the star if you have multiple photos on your layout. Let’s take a look at some layouts where one photo is clearly the star and notice how many different kinds of design can make that wonderful photo of yours truly stand out and shine!

make the photo the star  thanksgiving Layout Ideas Scrapbooking

Layout by Elijahsmom (Scrapbook.com)

This first layout clearly has a star photo! The cute baby’s first Thanksgiving is documented in a very effective way on this page. The photo is made the center of attention by making it slightly larger than the other elements on the page, including the other photo. The page is build-up out of very simple elements: The brown polka dots background color coordinates nicely with the brown outfit of the cute little boy and the circle with the fall colored leaves pulls all the separate elements beautifully together. The finishing touch is the cute turkey embellishment. 

Design element: If you have more than one photo on a page, make your star photo the largest.
Finishing touch: The cute turkey with its top hat.
Cute details: The little cornucopia embellishment in the lower left corner of the main photo forms a design triangle with the turkey and the “1st” title.

make the photo the star  thanksgiving Layout Ideas Scrapbooking

Layout by Barbara Carroll

This is a very traditional way of making the photo the star of the page: giving all the space to a group photo that it needs. You’d want to make a group photo large enough so you can actually see the people’s faces! The lovely family photo is very minimally embellished with a tone on tone layered background look and stamped title in gorgeous typewriter script.

Design element: Group photos deserve a large space on your page.
Finishing touches: Stamped leaves embellishing the title .
Cute detail: The little buttons added in several places to the page.

make the photo the star thanksgiving Layout Ideas Scrapbooking
Layout by Suzanna Lee
e

This is a different approach of making a photo the star. On this layout, the photo has become truly integrated with the rest of the page. I love the way that the page naturally flows from top to bottom. The little design elements flow naturally into the photo and are balanced below the photo with a little bit of journaling and some patterned paper. All the page elements fit beautifully together!

Design element: If possible, let your page let your page layout flow naturally into the photo and beyond.
Finishing touch: The “Thankful” title on placemat surrounded by the cute handmade feathers.
Cute detail: The little paint splatters on top bring a whimsical feel to this layout.

make the photo the star  thanksgiving Layout Ideas Scrapbooking
Source: stampingwitherica.blogspot.com

Being the only photo on the page, it can’t help being the star by default. But the eye is even more drawn to the object of the photo by the addition of the polaroid-style photo on top. You can also create this effect by adding a white frame. The colors of this family’s outfits and those of the nature scene behind them are beautifully mirrored in the chosen color palette. In all it’s simplicity, this layout is a very effective and cute design. 

Design element: Put extra emphasis on the subject in your photo by placing it. 
Finishing touch: The little banners of different pattern paper give a whimsical look to this layout.
Cute details: I love the scalloped edge on the bottom side of the photo.

make the photo the star  thanksgiving Layout Ideas Scrapbooking

Source: Pinterest

This photo is clearly the star, as your eye is immediately drawn to the two lovely people on it. The photo is not put in the middle, but on the left side of the layout and it is balanced on the right-hand side by a grid of stamped pieces of cardstock, decorated with some embellishments. This layout clearly shows that you do not have to put your photo in the middle of the page to make it shine. 

Design element: Experiment with putting your photo on one side of the page, balancing it out with other page elements.
Finishing touch: I love the way that the date is stamped on one of the square cards, as well the initials of the two kids in the photo.
Cute detail: Notice how the square brown background is place on top of a scalloped edged piece of pattern paper with stitching all around it. 

make the photo the star  thanksgiving Layout Ideas Scrapbooking

Source: Pinterest

This is such a fun photo and it certainly deserves pride of place in anyone’s Thanksgiving layouts!. The photo is put a little bit above the center and is framed by lovely sentiments and flowers. The addition of the lovely “Home For Thanksgiving” title finishes off the page beautifully. And sometimes that is all you need!

Design element: Frame your photo with lovely sentiments and embellishments.
Finishing touch: The little flower cluster on the left-hand side adds a little pizazz to this layout.
Cute detail: Notice how the “Thanksgiving” in the title is doubled up by a dark hand-letter font underneath. These details add depth to your layout.

make the photo the star  thanksgiving Layout Ideas Scrapbooking

Layout by Lynn Shokoples

Another very cute photo! This one is put on the page slightly off center and is layered on several pieces of angled patterned paper. This creates a bit of more whimsical look than if you would layer the papers in a straight way. This whimsical feeling is enhanced by the cluster of flowers on one side of the page and the row of little banners and tags on the other.

Design element: Layer your main photo on top of several angled pattern paper pieces and create a design triangle between the photo itself and embellishments on the lower left and right-hand side of the page.
Finishing touch: Angle your title with the angled pattern paper background.
Cute detail: I love the little brads used to create the washing line that holds up all the little tags and banners.

Make Your Own Thanksgiving-Themed Embellishments

All sorts of cute Thanksgiving-themed embellishments are for sale in stores and online. But wouldn’t it also be fun to make your own? You can use whatever papers and materials you have in your scrapbooking stash and around the house to create your very unique handmade Thanksgiving embellishment! It is far more cost-effective and very creative! And you can make your embellishments as big or as small as you need. This can be a tremendous advantage if you are a traditional paper scrapbooker. Let’s get inspired by other scrapbookers and take a look at their creations!

make your own thanksgiving themed embellishments thanksgiving Layout Ideas Scrapbooking
Layout by Becki Adams

I adore this handmade turkey! It’s so cute with its little polka dotted burlap head and body. And the little bow tie is just to die for! Just look at the gorgeous plumage he has been given. Those tailfeathers are made from all different scraps of a pattern paper (stash busting, anyone?) that somehow just all fit together. This little turkey is clearly a happy fellow, no wonder he’s holding a little flag saying “Happy Day”! 

This handmade turkey is the main focus of the page. The photos that are included are little squares and are snapshots of things around the house. None of the photos have that “star quality” that you’d be looking for in a feature photo, so it’s a great idea to make your own handmade Turkey embellishment the star! It sets the atmosphere and theme for the rest of the page.

Design element: Of course, the main design element of this page is the lovely handmade turkey!
Finishing touch: I love the gold paper strips (scalloped and straight) that frame the middle part of the layout. This gold paper is also used for the feet and little bow tie of the turkey, and in the chevron arrows pointing at the “Turkey Day” title.
Cute details: I just can’t resist that “Happy Day” flag, it’s so cute!

make your own thanksgiving themed embellishments thanksgiving Layout Ideas Scrapbooking

Layout by Wendy Sue

Another handmade turkey! This one is made up out of different patterned papers and has a really flamboyant set of colorful tail feather plumage! What a lovely and colorful addition to this layout! Again, the turkey is the star of the page, but is closely followed by the cute kids on the photo! Don’t you just love the title “I Love My Cute Turkeys“. 

Design element: Use “real” feathers for your handmade turkey! This gives your layout a soft and touchable finish.
Finishing touch: The strip of turkey pattern paper is so cute!
Cute detail: I love the way that the title is build-up out of smaller letter tiles and playfully arranged larger “Turkeys” letters.

Use Photo Grids To Get Many Photos On One Page

Using a photo grid on a scrapbook layout is nothing new. It is a great way to put multiple photos on one page. Photo grids are very practical, but certainly do not have to be boring. Just add your own creative flair and away you go! Let’s take a look at some of the photo-grid techniques used by different scrapbook layout creators and get inspired to use photo grids on our own Thanksgiving layouts!

use photo grids to get many photos on the page
Source: Pinterest

This grid-style layout is a bit fuzzy, but still clearly features one larger photo (doesn’t that turkey look amazing?) and a couple of smaller photos. This is a great way to add those “around-the-house” shots that are not spectacularly beautiful, but still add to the story and the memories. 

Design element: Feature one larger photo and make a grid of the smaller photos.
Finishing touches: The orange pattern paper beautifully coordinates with the color of the lady’s blouse!
Cute detail: The lovely food embellishments surrounding the “Thanksgiving” title. 

use photo grids to get many photos on the page

Layout by Sheri Catherine (Scrapbook.com)

This “messy” grid layout layers polaroid-like photos on a colorful background. Love those vertical chevrons! The images themselves are mostly closeups of “Thanksgiving type things”, and create a lovely library of “small” memories that are worth preserving.

Design element: Make a messy grid of those small photos.
Finishing touch: Ground your photo cluster grid with a strip of ribbon or pattern paper on the bottom of the page.
Cute detail: The orange paint splatters add a pop of color to the brown background. 

use photo grids to get many photos on the page
Layout by Jen Reedd

“Turkey Day”! If you have a lot of photos that you want to use, a grid layout like this is definitely the way to go! I love that the title is put on a corner, and not just in the middle on top, making the grid a bit more playful. The cute turkey embellishment is a fitting finishing touch!

Design element: Use an extensive grid (with rounded or straight corners) to fit a lot of photos on one page.
Finishing touch: Make your grid a bit more asymmetrical by adding the title in the corner.
Cute detail: The cute turkey embellishment!

use photo grids to get many photos on the page
Layout by Robyn Werlich

This layout shows a different kind of grid: the photos are clustered together in one corner of the page and the rest of the page is embellished with pattern paper, buttons, stitched leaves etc. I love the mix of square, vertically and horizontally oriented photos! Changing the images to black and white makes it easier to fit different photos together, since you don’t have to worry about clashing photo colors. The different pattern paper and various embellishments  provide some lovely matching colors.

Design element: Turn your photos to black and white to more easily group them together.
Finishing touch: Bring pops of color with strips of different pattern papers.
Cute detail: The little buttons added on one vertical paper strip!

use photo grids to get many photos on the page
Layout by DeanaB (Scrapbook.com)

Yet another type of grid! The bottom half of the page is used to grid some photos. The photo colors fit beautifully together because they are all quite dark. Using only part of the page for your photo grid leaves you with more than enough space for some extensive journaling. 

Design element: Only use part of the page for your photo grid.
Finishing touch: Darker photos more easily group together without clashing.
Cute detail: I love the green “grass” effect on the bottom of the page. 

use photo grids to get many photos on the page
Layout by Wendy Sue Anderson

In this layout, the page is divided in two parts. The upper half is filled with the title, the lower with a grid-type photo strip. Notice how one of the photos is in color, while the rest is black and white. The embellishments and pattern paper coordinate beautifully with the colors in the photo. 

Design element: Us a grid-type photo strip to display your photos. If you want, change them all (but one) to black and white.
Finishing touch: The large title is playfully laid out and made up out of cozy word pattern paper.
Cute detail: The twine wrapped around the top of the page.

use photo grids to get many photos on the page
Layout by Rebeccakeppel (Scrapbook.com) 

This lovely layout also uses a grid type photo strip. The strip consists of only two photos that are taken only seconds apart. That creates a “short movie”, adding to the story telling of the layout. The photos are cropped closely to only show the people and not much of the surroundings. This way you immediately focus on what the creator of this page wants you to focus on. The middle of the page is taken up by a large title and some large embellishments and the top of the page is mostly white space. 

Design element: Use photos that are taken only seconds apart for a great storytelling effect. 
Finishing touch: The beautiful “Thankful” die cut title.
Cute detail: Little lines of sequins are added to several places on the page. 

Halloween Scrapbook Layout Ideas – Part 1


Halloween Layout Ideas Scrapbooking

Let’s get inspired to scrap some wonderful pages with this extensive list of Halloween scrapbook layout ideas! Halloween is such a great time of year to scrapbook! Just think of all the wonderful costumes, food, decorations and pumpkins you can document! Not to mention the awesome creepy crawlies, ghosts, ghouls and other Halloween monsters! I just love this time of year and I love scrapbooking Halloween. It has its own traditional color scheme (orange, black and purple anyone?) that will make those Halloween scrapbook layouts immediately stand out.

Let’s take a look at some very creative Halloween scrapbook layouts out there on the web! I have diligently searched for all kinds of different moods, techniques and trends. Scroll down and get inspired!

Click the image to find products that can be used to create the individual layouts!

Awesome And Unique Layouts!

Let’s kick off this article with a threesome of awesome and unique layouts! These layouts are truly inspiring and show incredible creative flair. They show that documenting Halloween does not have to be boring and can be quite eye-catching and special, so scroll down and get inspired by these awesome and unique layouts!

Awesome and unique Halloween Layout Ideas Scrapbooking
Source: Pinterest.

This first layout has a lot of different elements that combine into a unified whole. There are the two main photos on the spider web background paper. And, of course, there are all the colored circles with black hearts and bats and other Halloween embellishments. The whole page has a whimsical look to it, whilst still being traditional Halloween in its color scheme. Layer your photos on a grid of interlocking circles and fill those circles randomly with all sorts of Halloween type embellishments.

Awesome and unique Halloween Layout Ideas Scrapbooking
Source: Pinterest.

The second layout is something special as well, but altogether different! Small squares and rectangles were cut from patterned paper and formed into a pumpkin shape standing out nice and orange against a purple and green background. What a wonderful way to use up your little paper scraps. The photo itself beautifully mirrors the purple of the background colors and is definitely the star of the show! Notice that the photo is an action shot of this cute trick-or-treater, capturing both the sweet costume and the action of getting in those Halloween candies!  I love the stitching on this page! It emphasizes the quilt look of this layout.

Colorpop On A Black Background Halloween Layout Ideas Scrapbooking

This third layout has a lot of elements that I absolutely adore! First of all, the picture is just brilliant! It is taken at an unusual angle showing a different aspect of the trick-or-treaters as they go around trying to gather as much Halloween candy as they possibly can. The second thing I really love is the color palette. By turning the photo to black and white you can use the orange the muted orange tint as a color pop across the layout. The third thing I absolutely love about this page is the little banner across with the title “Costumes”. It gives such a fun whimsical look to the page! I love the little rosette saying “Cute”: it’s a layered look that combines the color scheme of this page beautifully.

Colorpop On A Black Background

Halloween pages are by far the best reason to use black as a background. I love a black background: you can combine them with any kind of color scheme you like and they instantly give you a very dramatic look. Let’s take a look at a couple of layouts that use black backgrounds in different ways, combined with a Halloween color pop.

Colorpop On A Black Background Halloween Layout Ideas Scrapbooking

In this layout, the black background is very effective in showcasing the scalloped patterned paper with the color swirls. The photo and title are layered on top of this scalloped paper. The page is balanced out by the little tags on the left-hand side showing the dates. All in all, the black background makes the pale orange, purple and green pop up very nicely. Don’t hold back on the color swirls! I love the little black cat sitting on top of the “Spook” title!

Colorpop On A Black Background Halloween Layout Ideas Scrapbooking
Source: Pinterest

The background of this layout is more dark grey than black. It is layered on top of purple pattern paper. The folds and creases in the grey paper make the look of this page instantly more whimsical. The photos, title, and all the embellishments are grouped together in the center of the page. Star-shaped bursts of yellow paper pop out behind the cluster, giving this layout a very festive feel. I love the little candy corns and stars that are scattered around the central cluster. 

Colorpop  On  A  Black  Background Halloween Layout Ideas Scrapbooking
Source: scrappingwithchristine.blogspot.com

This happy little guy shows his scary carved pumpkin with deserved pride! It’s such a great photo and it deserves to be on a great layout. Again, the background isn’t completely black, but quite dark featuring light colored printed words and symbols. The page elements are all clustered in the center (this time in a horizontal orientation). The creator of this page used very brightly colored patterned paper to cut out circles and a big square and clustered them together to nicely contrast with the dark background. Notice that the background has a wide purple stripe down the middle adding to the dimension of this page. This purple band also creates unity between the background and the brightly colored cluster of page elements. I love how the journaling is tucked behind the cluster and the little card is balanced by an equally large card on the other side.

Document That Pumpkin Carving Action

Nothing says “Halloween” as loudly as carved pumpkins! For many families, it is a great tradition to select the perfect pumpkin and carving some scary Halloween shapes into it. This pumpkin carving action therefore, deserves to be documented in your Halloween scrapbook pages! Let’s take a look at how some other scrapbookers have taken this challenge and created completely different looks about the same subject.

Document That Pumpkin Carving Action Halloween Layout Ideas Scrapbooking
Source: memoriesoncloverlane.com

This first layout is all about the fun of pumpkin carving! The main photo is a funny portrait of the Pumpkin Carver! How cool are those glasses and headband?  The second larger photo shows the result of the pumpkin carving action, together with its little creator. Four smaller photos are spread across the top in a grid-like banner, showing the pumpkin gut scooping action. I love how these how the strip of photos really tells a story. I love that the journaling is in the first person format. This way you can journal the story of the child as they tell it themselves.

Document That Pumpkin Carving Action Halloween Layout Ideas Scrapbooking
Source: Pinterest

This layout also features a grid to document the pumpkin carving activities. I love the way this grid is combined with a striped pattern paper, the journaling and the large “Carve” title. The close-up of the pumpkin guts in the upper right corner of the photo grid is just awesome! It visually tells the story that the creator of this page documents in her journaling: she finds pumpkin guts really, really gross! The grid works really well with all the differently sized photos, because all the photos have a similar color scheme. I love the little banners on the top saying “Fright Night” and “I heart Halloween” and, of course, the little pumpkin on a stick with its little bow tie is absolutely adorable!

Document That Pumpkin Carving Action Halloween Layout Ideas Scrapbooking
Source: Pinterest

This layout documents the “pumpkin party of 2005” and features both a vertical photo of all the carving action as well as a horizontal photo on the bottom showing the absolutely fantastic final results. I mean, how cool are these pumpkins? The layout itself is pretty straightforward. The photos together with the journaling tell the whole story. The little “spooky” tag and orange polka dot ribbon is a very cute addition to the page.

Document That Pumpkin Carving Action Halloween Layout Ideas Scrapbooking
Source: Pinterest

Just look at this kid! He’s absolutely ready to show us his cute pumpkin! This layout is split into two with different awesome pattern paper backgrounds. The page is further divided by paper strips with some great stitching in the middle. I love the featured photo where the little boy tries to mimic the expression on the carved pumpkin’s face. The brightness of the photo and journalling area combined with the darker more gothic-like background paper gives an awesome effect. And who could resist that little orange spider in the middle of her rhinestone web? What a cute embellishment!

Document That Pumpkin Carving Action Halloween Layout Ideas Scrapbooking

Layout designed by Theresa Amlong

This last layout documenting the pumpkin carving action is fairly traditional. Notice how the three photos on top are all the same.  Combining these closely cropped photos you can create your own handmade banner for the page. I love how it is combined with the scalloped edge and the little orange hearts. The rest of the page show off the carving and gut scooping action and, of course, the final results with the proud creator sitting beside it. The little orange photo corners on the middle photo and the white border around it really make it pop!

Document The Halloween Costumes

Most of the fun of Halloween is getting to dress up! In this section, let’s take a look at the ways some of our fellow scrappers have documented some awesome Halloween costumes.

Document The Halloween Costumes Halloween Layout Ideas Scrapbooking
Source: Pinterest

This cute colorful witch outfit is highlighted with a full length photo (show off those props!) and three round happy faced detail photos. Journaling is added discretely as part of the bottom right cluster. Keeping the background dark makes sure that the colors of the photos really pop.

Document The Halloween Costumes Halloween Layout Ideas Scrapbooking
Source: Pinterest

The costume of this “spooky pretty candy corn witch” has been documented in this classic almost gothic-like layout. The color scheme is kept very sober: mainly greys and orange. This works very effectively in making the photos shine. By making the middle photo a little smaller and framing it differently, a little playfulness is added to the page. The pops of orange beautifully pick up the orange in the girl’s candy corn witch outfit. I love the little skeleton sitting on the little stand on the bottom right corner of the page! Such a cute detail!

Document The Halloween Costumes Halloween Layout Ideas Scrapbooking
Layout designed by Kelly Goree

Meet Harry Potter and his frenemies! What great costumes these kids have! Harry Potter himself, of course…, is given pride of place in the middle of the circle grid, but the other two wonderful costumes are documented as well. I love how the rest of the circles are filled up with patterned paper and several star-shaped embellishments. Notice how the gold glittery “H” forms a design triangle with the large star on the left and the small gold glittery star in the right upper corner. The different patterned papers are repeated throughout the layout. I love how the paper circles are stitched around. This layout may look simple with its grid-like structure, but closer inspection shows it has enough interesting details! As a finishing touch, I love the title “Harry Halloween”!

Document The Halloween Costumes Halloween Layout Ideas Scrapbooking

Layout designed by suslvgeo (Scrapbook.com)

This cute little witch with her beautiful see-through hat has pride of place in this colorful layout. The photo is kept in black and white which means the color pop comes solely from the papers and embellishments. The color palette is classic Halloween: purple, green, orange and black. Notice how extra focus is put on the photo by the circle stitching, lined with Halloween colored rhinestones. Making your photo black and white is a great idea if the subject in your photo isn’t that colorful anyway (in this case: black witch costume) and if the background can be colorful and distracting.

Document The Halloween Costumes Halloween Layout Ideas Scrapbooking
Source: Pinterest

This spooky layout is a very classic Halloween page. It shows the scary costumes of the kids in all their Halloween splendor. The background is built up out of torn strips of Halloween paper. The papers are torn on an angle which gives this page a more interesting look. The finishing touches are the black silhouetted cut-out embellishments, mirroring the black of the Halloween title. All the page elements are framed by an orange, black or grey frame. This pulls the entire layout together.

Document The Halloween Costumes Halloween Layout Ideas Scrapbooking
Source: store.scrapgirls.com

This is such a cute photo and these twins look absolutely adorable in their Halloween costumes. The photo rightly takes up the whole page and it naturally progresses into the title and journaling. This gives the whole page a very beautiful and unified look. I love the Halloween title with its cluster of candies and flowers and, of course, the black raven with its little top hat, embellished with a small orange flower. What a wonderful Halloween layout and what a great way to document the Halloween costumes of your children!

Document The Halloween Costumes Halloween Layout Ideas Scrapbooking
Layout designed by Paije Rodriguez

Yet another approach is this Buzz Lightyear Halloween page. The cute kid has an awesome Buzz Lightyear Halloween costume and he’s showing it off for the camera in all different poses. The creator of this page has chosen to feature several of those poses photos on this page! The color scheme is picked from the photos themselves, framing the photos in different colored frames and adding the little coloured squares in between the photos. Since this is clearly a digital page, it may not be possible for traditional paper scrapbookers to match the colors in your photos that exactly, but you can probably get really close. This layout is a great example of how to incorporate multiple photos without actually featuring one photo as the main photo.

Document The Halloween Costumes Halloween Layout Ideas Scrapbooking
Source: Pinterest

This is a traditional looking Halloween layout. The cute little girl in her adorable pumpkin outfit has pride of place, even though the photo itself is not that big. This might be because the quality of the photo isn’t great (which may be the case with older color photos). Whatever the reason, it certainly leaves a lot of space to add some awesome Halloween embellishments! I love the title “The Cutest Little Pumpkin”! It certainly fits this photo! The photo itself is flanked by two Halloween style cards and the finishing touch is the cute little banner of triangle flags. The whole page is pulled together with the stamped frame. Notice that because of the asymmetrical layout, the frame runs off the page. This helps to make the page look a little less boring.

Document The Halloween Costumes Halloween Layout Ideas Scrapbooking
Source: jenniferperkins.com

This little baby is ready for Halloween with its cute orange witches hat and adorable striped leggings! How can you resist such a cute Halloween costume? The page is very simple: it mainly consists of Halloween paper background and a framed photo. The photo is embellished with very minimally with a black cat and a little flag. This page shows us that traditional and simple can still be very effective in documenting your child’s Halloween costume.

Document The Halloween Costumes Halloween Layout Ideas Scrapbooking
Layout designed by Barkster (Scrapbook.com)

The featured photo on this page is the adorable girl being mysterious. I love how both photos are cut out from the background, drawing the focus solely to the child and her costume. The page is built up using traditional Halloween colors. The little spooks flying give a lovely creepy Halloween atmosphere to the page. Notice little eyeballs that are added to several places on the page, as well as the tiny spiders! Those cute little details can add a lot of character to your Halloween layout.

Document The Halloween Costumes Halloween Layout Ideas Scrapbooking
Layout designed by Marielle (wermemorykeepers.com)

Indiana Jones is ready for Halloween! What a cute costume this little guy has! The color palette of this photo this page is kept very muted, but still sports the traditional green, orange and grey. These muted colors fit beautifully with the subdued colors of the Halloween costume itself. The featured photo is the larger one and both photos are clustered together on top of various Halloween paper shapes. All of the page elements are pulled together by the added circle of the bottom paper layer. I love the two little spiders: they bring a whimsical feel to the page The paint splatters on the background also give the page a little bit more playfulness.

Document The Halloween Costumes Halloween Layout Ideas Scrapbooking
Source: Pinterest

Now, this oogly boogly little cutie has a lovely Halloween pumpkin onesie. She may even have a little orange make up put on her little nose! The featured photo is surrounded by a colorful frame, while three photos of the four other photos are arranged in a grid on the left side of the page.The cuteness of the used Halloween embellishments completely fits in with the photos. Notice the finishing touches, like the swirls and the added sequins in traditional Halloween colors scattered on the layout. My absolute favorites are the goofy looking skull, spider and bat. I’m just a sucker for those googly eyes!

Document The Halloween Costumes Halloween Layout Ideas Scrapbooking
Source: scrappingwithchristine.blogspot.com

Roar little monster! This colorful and cute Halloween costume is look wonderful in this brightly colored layout. The featured photo is surrounded by clusters of cute little monster embellishments and the other two photos are put on a yellow banner to group them together. I love the colourful circles of Halloween patterned papers. The circle theme pulls the page together and the little googly eyed monster embellishments add the perfect finishing touch.

Don’t Be Afraid Of White Space

Having seen all the wonderfully colorful and busy layouts with all the cute embellishments and all the spooky Halloween scrapbook papers, you may think that there’s no room for white space on Halloween scrapbook layout! This could not be further from the truth! If your style is a little bit more minimalist or if you prefer to have at least one of your Halloween layouts to be a little less cluttered with embellishments or busy background Halloween pattern paper scroll down to get inspired by taking a look at how some other scrapbookers have incorporated whitespace into their layouts. Give your eyes a little bit of rest! You’ll see that a Halloween layout with lots of white space doesn’t have to be boring!

Don’t Be Afraid Of White Space Halloween Layout Ideas Scrapbooking
Source: Pinterest

This layout has a very minimalistic look. The color scheme is chosen from the colors in the cute photo. The photo, placed on the left side of the page, is put on a background of repeating squares of pattern paper. The title is very unobtrusive. The rounded paper squares are digitally stitched to the brown and dark brown paper. This darker background nicely frames the whole layout. Grouping the page elements together in this simple way leaves a lot of white space for your eyes to restfully take in the beautiful layout.

Don’t Be Afraid Of White Space Halloween Layout Ideas Scrapbooking
Source: Pinterest

This layout has a lot of white space, but also has some fun elements. The three photos are put a grid-style photo strip on the lower half of the page. To balance it out the title is put on the strip of paper in the upper half of the layout. The finishing touch is the little spider hanging from its spiderweb. As the spider dangles towards the photos, the layout is brought nicely together. And it is giving us its biggest Halloween grin! This page is very minimalistic and very simple and it shows that even with very few elements on the page you can still have a playful and fun Halloween scrapbook layout.

Don’t Be Afraid Of White Space Halloween Layout Ideas Scrapbooking
Source: Pinterest

Technically this is not a Halloween layout, but given the orange color it very well could be! It really doesn’t get much more simple than this. The main picture is balanced out by the title and the whole page is pulled together by the massive brackets on each end. I love this look! The little button embellishments are cute finishing touches. You can imagine this layout as a Halloween page simply by replacing a photo with a typical Halloween photo, like your kid (or you!) in a costume. I love how the brackets direct your eyes towards the main focus of the page. This layout is minimalistic perfection.

Don’t Be Afraid Of White Space Halloween Layout Ideas Scrapbooking
Source: Pinterest

This layout is yet another really different example of how you can use white space. The photos are framed in colorful Halloween style frames. The color scheme uses the bright variety of the traditional Halloween colors. The framed photos and the embellishments are predominantly gritted on the right-hand side of the page. The little owl on top of the big Halloween title balances the page out. Notice the cute little spiders hanging down from the little spiderwebs! And also notice the oodles of white space left over on this page!

Finally You Have An Excuse To Use That Skull Pattern Paper

Halloween is such a wonderful excuse to use all the fun themed embellishments and papers! Grab this opportunity with both hands, after all: it is probably the only time you can use spooky and creepy skull patterned paper without having to explain yourself! Go for it!

Finally You Have An Excuse To Use That Skull Pattern Paper Halloween Layout Ideas Scrapbooking
Source: Pinterest

That is an awesome skeleton embellishment! The page itself is quite simple, but it features so many fun elements! The happy candy corn eating skeleton for instance and this little guy is balanced nicely with the candy corn “eye”. Notice the cute skeleton trick or treat paper! It’s such a fun way to decorate your Halloween pages! I love the way the title is done: “Candy Time”. The perfect finishing touch is the little “Trick Or Treat” banner. So cute!

What Glue Should I Use On My Scrapbook Pages?


What glue should i use on my scrapbook pages?

Experiment with non-permanent options like photo pockets. If a photo needs to be removed later on, or if it is a rare photo you don’t want to use any adhesive on you can use photo corners or photo pockets. The great advantage of photo pockets is that they will also protect your precious photo against scratching or other similar damage. You then can embellish the photo pocket without having to glue anything to the photo itself.

With so many glues and adhesives available it can be quite difficult and overwhelming to choose the right one for your particular scrapbook project.

In order to make the right choice, you need to know what type of materials you are using, how strong you need the adhesive to be and how quickly you would want the glue to dry. Knowing these things will help you choose the right adhesive for the job, with no need to worry about ugly tape marks or items getting unstuck and falling off the page!

What sorts of glues and adhesives are there?

You can sort the glues and adhesives in two general categories: “Wet” adhesives and “Dry” adhesives. Examples of the wet adhesives are glue guns, liquid craft glue, clear glaze, glue spray, glue sticks, glue pens, and glue paste. Wet adhesives tend to be stronger and more permanent and are very suitable for gluing heavier items together. Dry adhesives are for instance glue dots, one-sided or double-sided sticky tape, and photo corners. These dry adhesives are fairly easy to modify and reposition and are suitable for adhering lighter objects.

What glue should i use on my scrapbook pages?

What glue or adhesive should I use?

So, when should you use one of the “wet” kinds of glue and when one of the “dry” ones”?
Let’s make a list of what adhesive works best for what materials.

What is the best way of adhering photos?

Glue dots, double sided sticky tape or photo corners are best for adhering photos.
Glue dots and double sided tape adhere the photo from the back, thereby avoiding that ugly yellow residue left by one-side tape as often seen in old photo albums or scrapbooks. Glue dots and double-sided tape will adhere to almost any surface. They are easy to use, don’t get messy and don’t require any drying time. You can get both permanent or removable glue dots, the choice is yours. For adhering large photos there are glue dot dispensers available. When run in a straight line glue dots will be dispensed about an inch apart.

If you want to be able to remove (and put back) a photo, consider using removable glue dots or photo corners.
Photo corner mounts are these little triangles that stick to the page you can use to slip the corners of your photos into. This way your photos are easy to remove and replace. Most photo corners are “peel-and-stick”. You can usually reposition them with minimal or no damage to the page. Photo corners strongly adhere to the page, providing a long-lasting adhesive, while having no negative effect on your photos. An alternative for photo corners is photo tabs. When sticking down your photos, place one tab in each corner of the photo and not just one tab in the center. Photo tabs will not damage your photos. When removing a photo the photo tabs will safely lift off the page. If necessary, you can reattach the removed photo with a set of new tabs.

Fasteners, like brads, are also a great way to adhere your photo to its background.
Though technically not a glue or adhesive, fasteners do provide a strong adherence, but you do need to pierce your photo.

Don’t use hot glue guns for photos.
Although it is a strong adhesive, the heat and acidity of the glue can harm your images.

Don’t use one-sided (clear) tape for your photos.
As stated above, these can leave a nasty yellowing residue on your photos. Only use one-side tape, like washi tape, when the tape itself becomes part of the decoration on the page.

What is the best way of adhering small or light embellishments?

Tabs, glue dots and glue sticks are perfect for adhering small or light embellishments and accessories. If you choose to use a glue stick, make sure it is a good quality. Inferior glue sticks tend to dry up quickly or smear the glue in little lumps on your material. They also run out faster.

If you want to add a little dimension to your embellishment, try using mounting squares or little pieces of foam tape. This will make your little flower (or other embellishments) really pop off the page.

What is the best way of adhering die cuts, journaling cards or photo frames?

These types of additions need a sturdier adhesive. For adhering die cuts, journaling cards, photo frames or any other more substantial (read “heavier”) part of the scrapbook page use double-sided tape (foam tape if you want the item to be more dimensional). Double-sided tape is the perfect adhesive for flat, larger items like photos, ephemera, stamps, postcards etc. There are many forms of double sided tape available, from light-weight narrow tape to heavy-duty wide tape. The more substantial the item is that you want to adhere, the more heavy duty the tape should be. Make sure that the tape you are using is acid-free and (preferably) specifically designed for use in scrapbooking.

What is the best way of adhering (non-clear) plastic or metal items?

“Non-flat” embellishments, such as little plastic items or metal charms, are best adhered with liquid craft glue. This liquid glue will fill up all the little nooks and crannies of the item and which allows for tight adherence to your scrapbook page. Make sure you don’t use too much glue: if it oozes out from beneath your embellishments it could discolor your paper.

What is the best way of adhering vellum, clear or acrylic embellishments?

If you want to attach anything “see-through” to your scrapbook pages, make sure you don’t see glue residue or ugly tape. The best way of adding clear or acrylic items is to use a clear glaze. After drying, the glaze will be transparent and clear. You could also try to use “alternatives” to glue, for instance, brads, staples etc. These are great options when attaching vellum paper to your scrapbook page.

What is the best way to adhere heavy items, like thick cardstock?

If you need to attach very heavy items, like thick cardstock, glue paste is your best option. Pastes are chunky water-based glues. This means they provide a very durable adherence, but also require more time to dry and are more likely to wrinkle thinner materials, such as paper. Alternatively, you could use a high-quality liquid glue.

General tips for the best use of glues and adhesives?

Use non-acidic adhesives.
Over time, acidic adhesives will deteriorate the quality of your photos and papers. They produce that familiar yellow staining. Always read the labels of your adhesives to check for acidity and use in archival materials (like your scrapbooks!).

For the same (acidic) reasons don’t use sticky notes.
The adhesive on the backs of sticky notes is very acidic. Even short application, for instance, to label your photos prior to scrapbooking them, can affect and damage your papers or photographs.

Be careful with strong smelling glues. Adhesives with strong odors are more likely to be acidic.

Don’t use rubber cement.
There are some acid-free types of rubber cement out there, but even these are very messy to use on your scrapbook pages. Too much of the rubber cement will make your photo ripple and getting it on your fingers and hands will make you stick to just about everything. Why make it more difficult for yourself than it needs to be?

When using glue sticks, apply thin layers and don’t use too much.
This way you will have optimal adhesion and minimal wear on the glued item. You really don’t need that much glue to achieve solid adherence.

Spray adhesives can be used for simple and even application of adhesive to larger areas.
Make sure to use the spray adhesive in well-ventilated areas as their fumes may be toxic in large quantities.

Can You Scrapbook If You Don’t Have Kids?


Sometimes the only reason to scrapbook seems to be to document your children’s life. In fact, scrapbookers without children often face other people’s questions, like “Why would you scrapbook? You don’t even have kids. And you’re not even married. What if you and your boyfriend break up? What will you do with the pages?” Apparently, there are still people out there who believe you can only scrapbook if you have a husband, a couple of kids, a house in the suburbs and are a stay-at-home-mom.

Let’s be very clear: Yes, you can scrapbook if you don’t have kids! Husband or no husband, children or no children, there is so much value in documenting life! Whether childless or childfree, don’t get discouraged from documenting your memories by short-sighted people.

So, what are some of the misconceptions about scrapbooking out there?

“You scrapbook for your children”

If you have kids it is, of course, important to document their early childhood en development. And as a parent, you are the one to do it! But even though you may pour your heart and soul into your favorite hobby, there is by no means any guarantee that your children will want all the rows and rows of scrapbooks you’ve created over the years. As one avid scrapper put it: “I feel like my kids don’t want to wade through book after book after book. I could be wrong, but maybe not. I do think they’ll like looking back at stuff, just not everything they ever did.”Another scrapbooker, who recently got married and became a stepmom of two stepsons, jokes with her husband that “I’m creating these elaborate scrapbooks of trips and memories that neither of his sons are going to care about when these books get handed down to them. What a way to bring me down to reality. Either way, I enjoy scrapbooking. It keeps me sane!”

This last sentence brings us neatly to the next misconception:

“There is no reason to scrapbook if you don’t have kids.”

Or, in question form: “What is the reason to scrapbook if you don’t have any children?” The answer is really pretty simple: For most of the same reasons those wíth kids choose to scrapbook! Let’s take a look at some of the possible reasons for ANYONE to scrapbook:

Scrapbooking is a wonderful creative outlet.
Even if you are not the most creative type out there, scrapbooking can help you to get those creative juices flowing. Scrapbooking is all about getting inspired to tell your story, to share your life. You don’t need to be creative or a designer to glue a photo to a page and journal about it. You just need to do it. Systems like Project Life provide an even easier and quicker format to get your life down in photos and on paper. Let yourself get inspired by your photos, by the cute supplies or by your own story and be creative, even if you don’t consider yourself a creative type of person.

Scrapbooking is a great way to reflect.
Flipping through old photos and memorabilia will bring back many memories. What a great starting point to reflect on your life, the things you have done and the people you have met! Everybody could use a little trip down memory lane every now and then. Documenting your past stories will help give you perspective on life and even think about the future.

Scrapbooking will help you focus.
Scrapbooking will help you focus, not just on your life and the stories you have to tell, but it will also help you focus on the “right here and now” as you are trying to find the best way to put those photos and stories onto paper. As one scrapbooker put it: “When I’m working on a creative project (…) I get in a zone. When I’m working on the album – choosing photos, cropping images, selecting items to tuck into the pages – I’m fully immersed in what I’m working on. I feel a sense of energized focus, in which I’m fully involved in (and enjoying!) what I’m doing. As an incessant multitasker, any activity that allows me to experience this deep sense of focus is a worthwhile pastime. When I’m deeply involved in an activity, I’m 100% in the moment — which is one of the best benefits of working on the album.” Scrapbooking can help you to stop multitasking and just be in that one moment.

Scrapbooking can give a great sense of fulfillment.
Documenting your memories, even the very recent ones, forces you to slow down a bit and really concentrate on all those things you have been doing in the past few days, weeks, months. Rather than just living your life from day to day, scrapbooking can help you to consider all the things you have done, seen and accomplished. Looking back on your adventures and accomplishments will make you realize just how much you do in a week! Don’t just gloss over life’s events, use scrapbooking to pause and take note. Really noticing your accomplishments will leave you greatly fulfilled.

Scrapbooking can give you great insights into yourself.
Tracking your activities and documenting your life will give you a lot of insight into yourself. Scrapbooking can help you to see what things are really important to you. It can also identify some areas of your life that perhaps you could focus on more. Documenting your life will help you get to know yourself better, and by knowing yourself better, you’ll be able to love yourself more. One scrapbooker put it like this: “Project Life has helped me make time to focus on me, to pay attention to the things that happen to me and the things that matter most in my life. (…) There’s something about creating your own album (…) that gives you a deeper insight into who you are and what matters most to you.”

On the surface, scrapbooking may look like just another crafty diversion, but if you look closer you’ll see all the benefits that documenting your life can bring. And these benefits are not just available to the scrapbooking moms out there, they are available to all scrapbookers, whether with or without children!

“If you don’t have kids you have nothing to scrapbook about”

It is understandable that when you are a mom, a lot of your life revolves around your children. It might even give you a skewed view of the world at large. There are so many other stories to tell! Here’s a list of what “real life” child-free or childless scrapbookers are scrapbooking about!

  • Family
  • Friends
  • Your boyfriend, husband, relationships
  • Your home (and/or past homes)
  • Your job or business
  • What you eat and drink
  • Who you spend time with
  • Your pets (yes, by all means, get those cute puppy shots documented!)
  • Everyday life
  • Likes and dislikes
  • Travel
  • Events (concerts, theatre performances etc)
  • Nature
  • Random musings or thoughts
  • Life anecdotes
  • TV shows or movies you watch
  • Childhood memories
  • Your scrapbooking buddies
  • Your shoe collection
  • The first day of snow
  • Your garden
  • Your first car
  • Music you love
  • Poems
  • Heritage photos
  • Your hometown
  • Your hobbies
  • Your coworkers
  • Your weight loss journey
  • Surgeries or other health issues

This is by no means a complete list, but it does show a great variety of subject to scrap about!

Document YOUR life!

What it all boils down to in the end is that scrapbooking is about embracing your personal story and documenting it in the way that you want. You are entitled to tell that story and it deserves telling. Nobody’s life is boring. There are always awesome stories to tell. And you are the best person to do it.

Scrapbooking was not made to tell stories about kids alone. It was made for you. Record your life. You’ll be glad that you did. After all, creating a scrapbook has less to do with the person you plan to hand it down to. It has everything to do with capturing and documenting those stories of your life today. Your life right now is just too great to not record.

Let’s end this article with a quote from a very enthusiastic scrapbooker. It really says it all!

“I used to think “I don’t have kids so why should I bother?” I don’t have kids and don’t plan to, but why the heck shouldn’t I still have an amazing scrapbook?! This is the most exciting time in my life! I have lost a bunch of weight, I am starting a business, I feel like I am on the edge of some fabulous years and I want to make sure I get every piece so when I’m old and crotchety I have something cool to thumb through while I sit on my porch and yell at kids in my yard.”